Author: commandandsimplify

  • I Ran My First Half Marathon at 51. Here’s What the Journey Taught Me.

    I Ran My First Half Marathon at 51. Here’s What the Journey Taught Me.

    On October 25, 2026, at 51 years old, I completed my first half marathon.

    My watch recorded 13.3 miles. My finishing time was 2 hours, 9 minutes, and 30 seconds. I even finished second in my age group.

    Sounds pretty good, right?

    Well, let me tell you something.

    It was REALLY hard.

    When I crossed that finish line, I wasn’t thinking about my time. I wasn’t thinking about my age-group finish. I was exhausted, proud, relieved, and, quite frankly, glad the whole thing was over.

    And by the whole thing, I don’t just mean the race.

    I mean the months of training, the injuries, the uncertainty, the early runs, the long runs, and the days when I wondered whether I was going to make it to the starting line at all.

    But looking back, I’m glad I did it.

    And the best part had nothing to do with running.

    It Started With One Manageable Step

    I didn’t wake up one morning and decide I was going to run 13.1 miles.

    My running journey started with shorter distances. One mile eventually became a 5K. Then came a 10K.

    As I became more comfortable, I started wondering what else I might be capable of.

    That’s when the half marathon entered the picture.

    I set my sights on October 25 and started working toward it.

    There was no magic formula. I ran consistently, gradually increased my distance, and tried to balance training with the rest of my life.

    Some days were encouraging. Other days were anything but.

    And I learned pretty quickly that having a training plan doesn’t mean everything will go according to that plan.

    Then Came the Setbacks

    Early in my training, a hip problem took me out of running for roughly two weeks.

    That was frustrating enough.

    Then, in August, I started experiencing pain around my Achilles tendon near the heel.

    This wasn’t simply being a little sore after a workout. At times, walking the next day was difficult.

    I didn’t run for a month.

    Suddenly, the question wasn’t how fast I could run my half marathon.

    It was whether I’d be able to run it at all.

    I had already put in a lot of work. Stopping wasn’t what I wanted to do, but continuing to push through the problem wasn’t a good answer either.

    So I rested, adjusted my training, and eventually started rebuilding.

    And when I say rebuilding, I mean starting small again.

    Learning to Run Again

    I returned with walk-and-jog intervals.

    Five minutes walking, two minutes jogging.

    Eventually, the jogging portions became longer and the walking portions became shorter.

    It wasn’t particularly glamorous.

    Nobody’s making a highlight video of a 51-year-old guy checking his watch to see if his two minutes of jogging are finished.

    But those sessions mattered.

    Little by little, I started running continuously again.

    Then came three miles. Four miles. Five miles.

    Eventually, I worked my way back to longer runs.

    There were days when my legs felt heavy and my energy wasn’t there. I made mistakes with fueling and learned that what I ate, drank, and did the night before a long run mattered.

    My longest training run before the race was 11 miles.

    That was enough for me to know the half marathon was going to be difficult.

    But it also gave me reason to believe I could finish.

    Race Day: October 25, 2026

    When race day finally arrived, I knew I had done what I could to prepare.

    I also knew I hadn’t followed some perfect training schedule.

    There had been interruptions, changes, and compromises along the way.

    But I was standing at the starting line.

    And that was something.

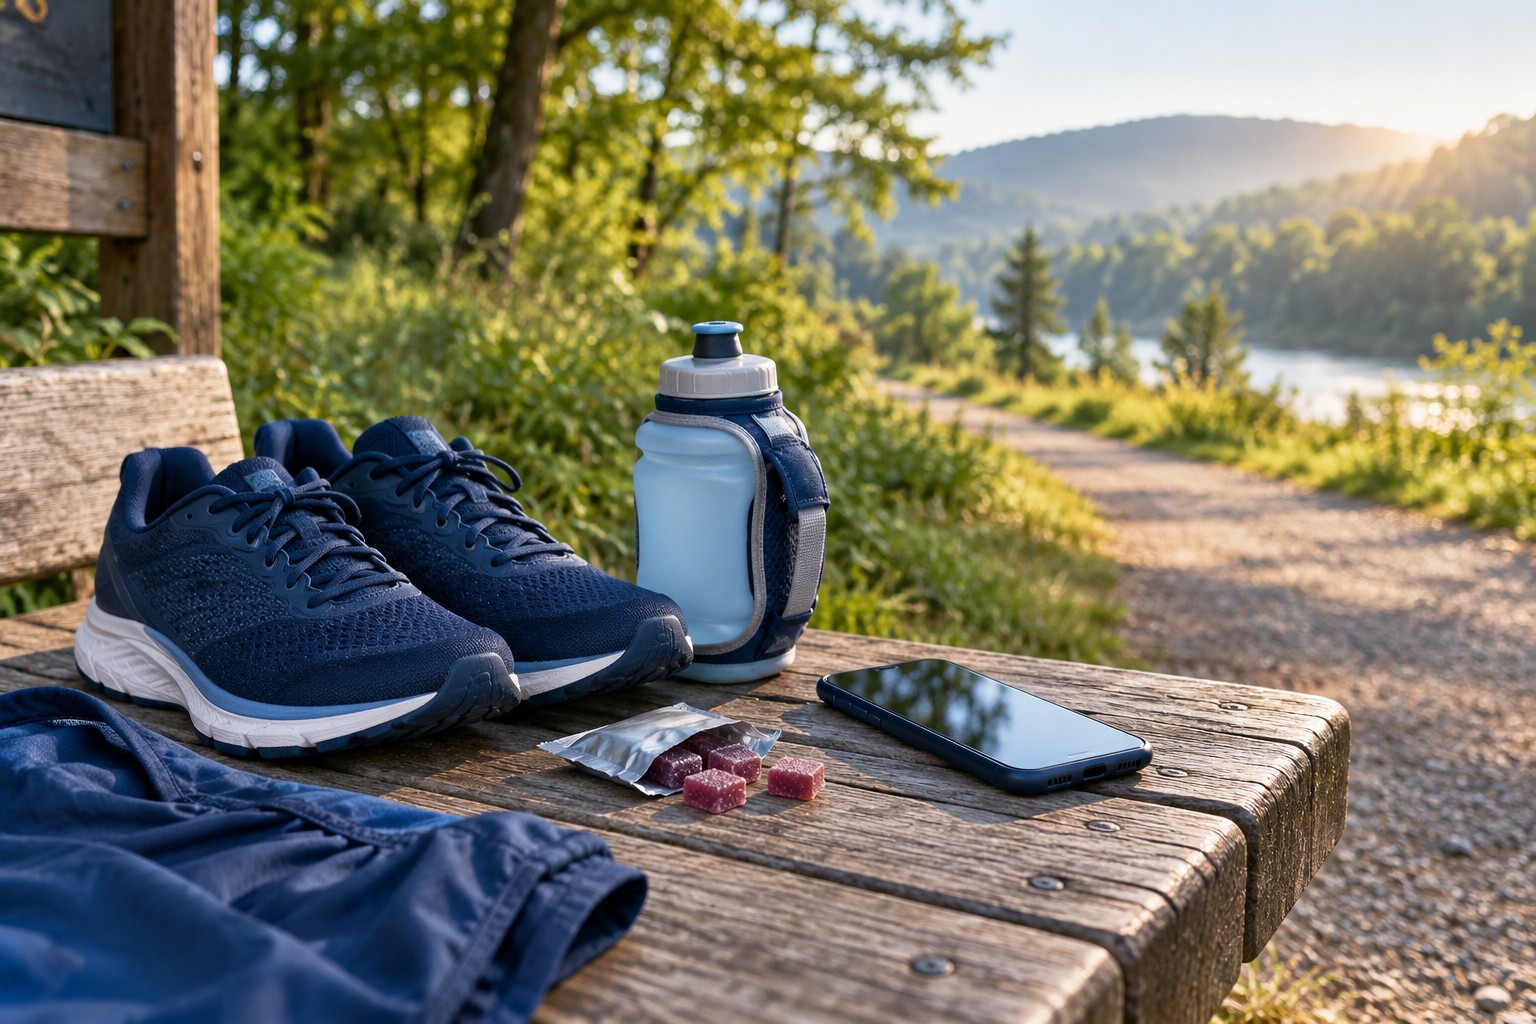
    My strategy was simple: keep moving, manage my energy, and walk briefly when drinking water.

    As the miles added up, the race got harder.

    Then harder.

    Then harder still.

    I wasn’t cruising along thinking about how enjoyable this whole experience was.

    I was working.

    And when I finally crossed the finish line, I was spent.

    13.3 miles. 2:09:30. Second place in my age group.

    I had done it.

    The Best Part Wasn’t the Finish Time

    Here’s what mattered most to me.

    My kids were there.

    They got to see their dad set a difficult goal, work toward it for months, deal with setbacks, and ultimately finish what he started.

    Not because I needed to impress them.

    Not because I wanted them to think their dad was some great athlete.

    I wanted them to see what commitment looks like.

    I wanted them to understand that accomplishing something difficult usually involves more than enthusiasm at the beginning.

    There are going to be setbacks.

    There are going to be days when things don’t go right.

    Sometimes you’re going to have to change your approach.

    Sometimes you’re going to have to start rebuilding from a place you thought you’d already moved beyond.

    But you can keep working toward something that matters to you.

    That’s what I hoped they would take away from watching this journey.

    And that meant more to me than any finishing time ever could.

    So, Am I Done Running?

    Funny thing.

    On race day, I remember thinking that I might not run again for quite a while.

    Maybe not until spring.

    I had certainly had enough running for one day.

    But a couple of days later, I found myself thinking about signing up for another 5K in November or December.

    In the cold.

    Apparently, exhaustion has a short memory.

    I’m not sure what running will look like for me this winter, and I still need to respect the soreness and recovery that come with a demanding race.

    But I do know this.

    I’m glad I took on the challenge.

    Not because I ran a particular time or finished in a particular place.

    I’m glad because I committed to something, worked through difficult stretches, and saw it through.

    And because my kids were there to see it.

    What I’d Tell Someone Thinking About Their First Race

    You don’t have to start with a half marathon.

    You don’t even have to start with a 5K.

    Start with something manageable.

    Build consistency. Increase gradually. Respect injuries and recovery. Make adjustments when life or your body demands them.

    And don’t get so focused on the final destination that you forget to recognize the progress you’re making along the way.

    My half marathon wasn’t where my running journey began.

    It was simply the next challenge.

    And it taught me something I hope my kids remember, too:

    You don’t have to know exactly how you’re going to accomplish something before you begin.

    You just have to be willing to commit, start, keep learning, make adjustments, and continue working toward it.

    Small steps. Big finish.


    This is a personal account of my running experience, not a training prescription. Running involves physical risks, and training should be adjusted to individual health, fitness, and recovery needs.

  • 14 Home Organization Products That Actually Make Life Easier

    14 Home Organization Products That Actually Make Life Easier

    Simple solutions. Less clutter. More space. A calmer home.

    Ever notice how clutter seems to multiply when nobody’s looking?

    One day, the kitchen counter is clear. The next, it’s covered with mail, school papers, keys, and things that don’t seem to belong anywhere.

    The garage becomes a storage museum. Kitchen drawers turn into archaeological digs. And somewhere in the house is a charging cable that fits absolutely nothing you own.

    Sound familiar?

    The good news is that organizing your home doesn’t require expensive renovations, custom closets, or hundreds of matching containers.

    Sometimes a few well-chosen products can make everyday life a whole lot easier.

    But here’s something important: Don’t buy organization products just to organize things you don’t need.

    Start by getting rid of unnecessary clutter. Then figure out which products will actually help you make better use of the space you have.

    Here are 14 practical home organization products worth considering.

    1. Clear Storage Bins

    Clear storage bins are one of the simplest ways to organize closets, cabinets, shelves, and storage areas.

    Their biggest advantage? You can see what’s inside without opening every container.

    They’re great for seasonal clothing, holiday decorations, craft supplies, toys, and household extras.

    What to look for:

    • Sturdy construction.
    • Stackable designs.
    • Secure-fitting lids.
    • Sizes that fit your available shelves.
    • Clear sides so contents remain visible.

    Quick tip: Measure your shelves before purchasing bins. Buying 10 containers only to discover that none of them fits is a pretty frustrating way to get organized.

    2. Drawer Organizers

    Everybody has a drawer that could use a little help.

    Kitchen utensils, office supplies, bathroom products, and miscellaneous household items have a way of getting mixed together.

    Drawer organizers create designated spaces for everything.

    Adjustable dividers are particularly useful because they let you customize the layout.

    What to look for:

    • Adjustable compartments.
    • Easy-to-clean materials.
    • A secure fit inside your drawer.
    • Enough space for the things you actually use.

    Quick tip: Empty the drawer and sort its contents before buying an organizer. You may discover you need fewer compartments than you thought.

    3. Under-Sink Organizers

    The cabinets underneath kitchen and bathroom sinks are often awkward spaces.

    Pipes, disposal units, and plumbing fixtures can make ordinary shelving difficult.

    That’s where adjustable under-sink organizers can be helpful.

    Sliding shelves and two-tier organizers can make cleaning supplies and household essentials easier to access.

    What to look for:

    • Adjustable height and width.
    • Moisture-resistant materials.
    • Pull-out shelves or baskets.
    • Enough clearance around existing plumbing.

    Quick tip: Measure around your pipes before ordering anything. Also, keep cleaning chemicals and potentially hazardous products secured away from children and pets.

    4. Label Maker

    A label maker might seem unnecessary until you start organizing storage containers, paperwork, pantry shelves, or garage bins.

    Labels make it easier to find things—and, more importantly, put them back where they belong.

    They can be especially helpful in households where several people use the same storage areas.

    What to look for:

    • Easy-to-read labels.
    • Affordable replacement tape.
    • Simple controls.
    • Label materials appropriate for the surface and environment.

    Quick tip: You don’t necessarily need an electronic label maker. A permanent marker and inexpensive labels can work just as well. Also silver duct tape works great.

    The goal is organization, not winning a labeling competition.

    5. Shoe Storage

    Shoes have a remarkable ability to spread across entryways, closets, bedrooms, and garages.

    A simple shoe rack or organizer can help keep them together and off the floor.

    The best solution depends on your available space.

    For some households, a basic floor rack works perfectly. Others may benefit from stackable shoe shelves or hanging organizers.

    What to look for:

    • Appropriate dimensions for your space.
    • Enough capacity for regularly worn shoes.
    • Easy access.
    • Durable construction.

    Quick tip: Keep everyday shoes near the door and move seasonal or rarely worn footwear into another storage area.

    6. Garage Shelving

    Garages tend to collect everything that doesn’t have a permanent home.

    Tools, sports equipment, holiday decorations, gardening supplies, and the occasional mystery box from 2014.

    Heavy-duty garage shelving can help reclaim valuable floor space.

    It also makes it easier to group similar items together and locate things when you need them.

    What to look for:

    • Appropriate weight capacity.
    • Sturdy construction.
    • Adjustable shelf heights.
    • Shelves suited to your garage conditions.
    • Manufacturer-recommended anchoring or securing methods.

    Quick tip: Before buying shelving, get rid of broken equipment and things you no longer use. Store heavy items on lower shelves and keep access routes clear.

    7. Cord and Cable Organizers

    Charging cables, computer cords, extension cables, and electronic accessories can quickly turn into a tangled mess.

    Cable organizers are simple products that help keep wires separated, accessible, and easier to identify.

    Depending on your needs, you might use cable clips, hook-and-loop straps, cord sleeves, or a dedicated charging station.

    What to look for:

    • Reusable straps.
    • Easy installation.
    • A design suitable for your cables.
    • Materials that won’t damage furniture or cords.

    Quick tip: Label chargers and cables before storing them. And don’t run electrical cords underneath rugs or overload outlets just to make an area look cleaner.

    8. Pantry Containers

    An organized pantry can make meal preparation and grocery shopping much easier.

    Food storage containers can help group ingredients, make items easier to see, and reduce open packages cluttering shelves.

    Clear containers are particularly useful for frequently used dry goods such as pasta, rice, cereal, and baking ingredients.

    What to look for:

    • Food-safe materials.
    • Secure-fitting lids.
    • Sizes suited to the quantities you purchase.
    • Stackable shapes.
    • Containers that are easy to clean.

    Quick tip: Keep food labels, cooking instructions, expiration information, and allergen details accessible when transferring food from its original packaging.

    You can also use organizational bins to group snacks, spices, baking ingredients, and other similar products without transferring everything into separate containers.

    9. Over-the-Door Storage and Hooks

    Doors offer convenient storage opportunities that often go unused.

    Over-the-door hooks and organizers can hold jackets, hats, bags, toiletries, cleaning accessories, and other everyday items.

    They’re especially useful in smaller homes or rooms where floor space is limited.

    What to look for:

    • Proper fit for your door.
    • Smooth edges that won’t damage the door.
    • Appropriate weight capacity.
    • A design that won’t interfere with closing or latching.

    Quick tip: Make sure an organizer doesn’t prevent a door from operating safely. And resist the temptation to turn every door into an overloaded coat closet.

    10. Rolling Utility Cart

    A rolling utility cart is one of the more versatile storage products on this list.

    It can serve as a craft station, office supply cart, bathroom organizer, laundry helper, or convenient place for frequently used household items.

    The biggest advantage is mobility.

    You can move the supplies to wherever you’re working instead of carrying everything back and forth.

    What to look for:

    • Smooth-rolling wheels.
    • Locking casters when appropriate.
    • Sturdy shelves.
    • Suitable weight capacity.
    • Dimensions that fit your storage area.

    Quick tip: Assign your cart one primary purpose. Otherwise, it may turn into a three-tier junk drawer on wheels.

    11. Storage Baskets

    Not everything needs to live inside a plastic container.

    Storage baskets offer a practical and attractive way to keep everyday items together.

    They’re useful for blankets, children’s toys, magazines, accessories, and other items that frequently get left around the house.

    Baskets work especially well in living rooms, bedrooms, and entryways.

    What to look for:

    • The right size for your space.
    • Easy-to-carry handles.
    • Durable materials.
    • Surfaces that are easy to clean when necessary.

    Quick tip: Use baskets for specific categories, not just as places to hide clutter. A basket labeled “Things We Don’t Know What to Do With” is probably not a long-term organizational strategy.

    12. Vertical Shelving

    This is one of the BEST ways to organize a garage or basement. Get items up off the floor and it feels like you have a ton more space. When floor space is limited, sometimes the best solution is to look up.

    Wall-mounted shelves and vertical shelving units can help organize books, decorations, office supplies, storage containers, and other household items.

    They can also make use of otherwise empty wall space.

    What to look for:

    • Appropriate load ratings.
    • Suitable mounting hardware.
    • Shelves sized for the items being stored.
    • Materials suited to the room.
    • A design that’s easy to access.

    Quick tip: Follow installation instructions and use suitable wall anchors or studs. Tall freestanding furniture should be secured against tipping, especially in homes with children.

    13. A Dedicated Donation Bin

    Here’s one of our favorite organization ideas, and it doesn’t require an expensive product.

    Keep a designated donation bin somewhere convenient.

    Whenever you come across clothing, toys, household goods, or other usable items you no longer need, place them inside.

    Once the bin fills up, sort its contents and donate appropriate items.

    It creates a simple habit that helps prevent unnecessary belongings from accumulating.

    What to look for:

    • A reusable bin or basket.
    • Enough room for small household items.
    • A convenient but unobtrusive location.
    • A clear label identifying its purpose.

    Quick tip: You can also create a separate area for items you want to sell. Just give yourself a deadline, so the sell pile doesn’t become another permanent storage area.

    14. Heavy-Duty Storage Totes

    Those heavy-duty black storage totes with yellow lids deserve their own spot on this list.

    Unlike smaller clear storage bins used inside the house, these tough containers are particularly useful for garages, basements, workshops, and seasonal storage areas.

    They’re great for keeping camping equipment, holiday decorations, sports gear, tools, and household supplies together.

    Their stackable design can also make it easier to organize larger storage areas.

    What to look for:

    • Heavy-duty plastic construction.
    • Reinforced, secure-fitting lids.
    • Strong handles.
    • Stackable designs.
    • Sizes compatible with your shelving.
    • Appropriate weight capacity.

    Quick tip: We particularly like the black totes with yellow lids. Label the outside so you know what’s inside, keep heavier containers at the bottom, and measure your shelving before buying.


    The Extra Mile: Your Home Organization Shopping & Planning Checklist

    Before spending money on bins, shelving, or organizers, take a few minutes to make a plan.

    The goal isn’t to fill your home with organizational products.

    It’s to make everyday life easier.

    Step 1: Identify the problem areas

    Walk through your home and identify three spaces that would benefit from improvement.

    Maybe it’s a crowded pantry, an overflowing garage shelf, or a drawer that hasn’t closed properly since last Christmas.

    Step 2: Get rid of unnecessary clutter

    Before buying storage products, remove things you no longer use or need.

    Decide what to keep, sell, donate, recycle, or dispose of responsibly.

    Step 3: Measure your spaces

    Measure shelves, cabinets, drawers, and available floor space before shopping.

    Pay attention to plumbing, doors, electrical access, and other obstacles.

    Step 4: Choose products that solve real problems

    Review the 14 products above and identify what would genuinely help.

    You probably don’t need all of them.

    Step 5: Set a budget

    Decide how much you’re comfortable spending.

    Check whether something you already own could do the job before buying something new.

    Step 6: Make it easy to maintain

    Organization systems should be simple enough for your household to keep using.

    If putting something away requires moving six containers, opening three lids, and solving a puzzle, there’s probably a better system.

    Free download: Home Organization Shopping & Planning Checklist

    Our Extra Mile printable helps you identify problem areas, take measurements, choose products, plan purchases, and track your budget.

    Final Thoughts

    A more organized home doesn’t necessarily require more stuff.

    In fact, it often starts with less.

    When you remove unnecessary clutter and give the things you use a logical place to live, everyday tasks become simpler.

    You spend less time searching for things, less money buying duplicates, and less energy dealing with disorganization.

    Start with one problem area. Choose a simple solution. Build from there.

    Small changes. A more organized life.

    Command & Simplify — Practical Tools for a Simpler Life.

  • 10 Kitchen Tools That Make Meal Prep Faster and Easier

    10 Kitchen Tools That Make Meal Prep Faster and Easier

    Less time. Less stress. Healthier meals. And hopefully fewer dishes.

    Ever open the refrigerator, stare at what’s inside, and wonder what in the world you’re going to make for dinner?

    You’re not alone.

    Between work, school, kids’ activities, and everything else on the schedule, putting together a decent meal can sometimes feel like one more chore.

    And when you’re hungry, tired, and staring at a pile of vegetables that need chopping, ordering pizza starts sounding pretty reasonable.

    The good news is that meal preparation doesn’t have to be complicated.

    Having the right kitchen tools can save time, reduce frustration, and make cooking at home more manageable.

    You don’t need a kitchen full of expensive gadgets, either. In fact, some of the most helpful tools are surprisingly simple.

    Here are 10 kitchen tools worth considering.

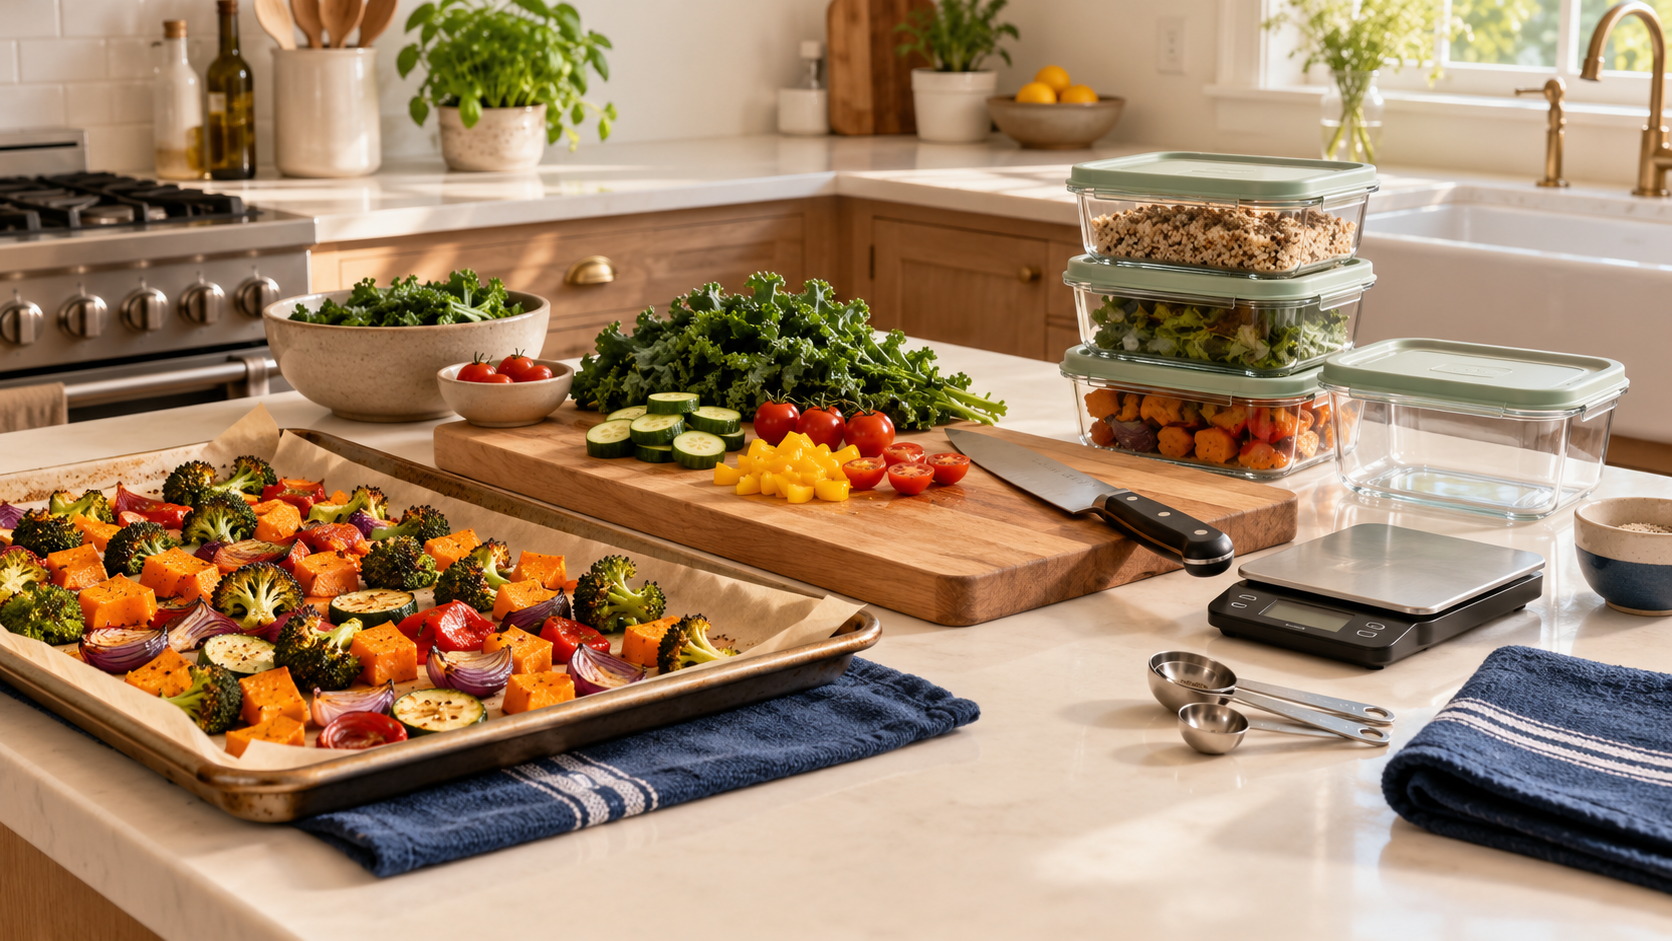
    1. Chef’s Knife

    A good chef’s knife might be the most useful tool in your kitchen.

    From chopping vegetables and slicing fruit to preparing meat and mincing herbs, a dependable knife handles a remarkable number of everyday jobs.

    A sharp, comfortable knife also makes food preparation easier and gives you better control than struggling with a dull blade.

    What to look for:

    • A comfortable handle with a secure grip.
    • A blade that’s easy to control.
    • A size and weight that feel comfortable in your hand.
    • Durable construction that can be maintained and sharpened.

    You don’t necessarily need an expensive professional knife. A well-made, affordable chef’s knife can serve you for years.

    Quick tip: Keep your knife sharp, use a stable cutting board, and store the blade safely. A dull knife that slips is nobody’s idea of a good dinner experience.

    2. Cutting Boards

    Cutting boards are one of those everyday kitchen essentials that don’t get much attention until you find yourself trying to chop an onion on a plate.

    Having a few dependable cutting boards makes food preparation simpler and more organized.

    We especially like the idea of keeping separate boards for different jobs, such as raw meat and fresh produce.

    That helps reduce the risk of cross-contamination.

    What to look for:

    • A stable, nonslip surface.
    • Enough room for chopping ingredients.
    • A material that’s easy to wash and maintain.
    • More than one board so you can separate food preparation tasks.

    Quick tip: A cutting board that slides around the counter is an accident waiting to happen. Use a nonslip mat or another appropriate stabilizer underneath if necessary.

    3. Food Storage Containers

    If you’re going to spend time preparing meals in advance, you need somewhere to put everything.

    That’s where good food storage containers earn their keep.

    They’re useful for leftovers, lunches, chopped vegetables, portioned ingredients, and meals you prepare ahead of time.

    Stackable containers can also help keep your refrigerator from turning into a collection of mystery bowls covered with aluminum foil.

    What to look for:

    • Secure-fitting lids.
    • Stackable sizes.
    • Food-safe materials.
    • Containers suitable for the refrigerator, freezer, or microwave according to the manufacturer’s instructions.
    • Shapes that fit your storage space.

    Quick tip: Label prepared food with the date. It’s much easier to use leftovers when you actually know how long they’ve been in the refrigerator.

    4. Digital Kitchen Scale

    A digital kitchen scale is useful for more than baking.

    It can help measure ingredients accurately, divide recipes into portions, and reduce the need to dirty multiple measuring cups.

    For people who follow recipes closely or prepare meals in batches, a scale can be surprisingly convenient.

    What to look for:

    • Easy-to-read display.
    • Simple unit conversion.
    • A tare function to reset the measurement after placing a bowl on the scale.
    • A surface that’s easy to clean.

    Quick tip: Place an empty bowl on the scale, press tare, and add your ingredient. It’s a small feature that can save time and cleanup.

    5. Sheet Pans

    We use sheet pans every day.

    Sometimes the easiest dinner is the one that mostly cooks itself.

    Sheet pans are terrific for roasting vegetables, preparing proteins, and cooking several ingredients in the oven.

    You can chop your ingredients, season them, spread them out, and let the oven handle much of the work.

    Just make sure foods with different cooking times and safe internal temperature requirements are prepared appropriately.

    What to look for:

    • Sturdy construction.
    • A size that fits your oven.
    • Raised edges to help contain juices.
    • A surface that’s easy to clean.

    Quick tip: Don’t overcrowd the pan. Giving ingredients enough room can help them roast rather than steam. Put parchement paper down first then cleanup is easy!

    6. Vegetable Chopper

    If chopping onions, peppers, carrots, and other vegetables takes forever, a vegetable chopper might become one of your favorite kitchen tools.

    Many models use a manual press or lever to cut ingredients into smaller, more uniform pieces.

    They’re especially helpful when preparing vegetables for soups, salads, casseroles, or larger batches of meals.

    What to look for:

    • Sharp, durable cutting blades.
    • A stable base.
    • An effective safety guard.
    • Components that are easy to disassemble and clean.
    • A container large enough for your usual recipes.

    Quick tip: Consider how difficult the chopper is to clean before buying one. A gadget that saves five minutes chopping but takes 15 minutes to wash isn’t much of a bargain.

    7. Measuring Set

    Measuring cups and spoons aren’t exciting, but they’re reliable little workhorses.

    Whether you’re preparing a recipe, measuring baking ingredients, or mixing a homemade sauce, a complete measuring set helps take the guesswork out of cooking.

    For everyday use, a simple set may be all you need.

    What to look for:

    • Clearly marked measurements.
    • Durable materials.
    • Easy-to-clean construction.
    • Cups and spoons that store neatly together.

    Quick tip: Keep measuring tools in one designated drawer or container. Spending five minutes looking for the quarter-teaspoon isn’t exactly efficient meal prep.

    8. Slow Cooker

    A slow cooker can be incredibly convenient for busy households.

    Soups, stews, shredded meats, chili, and other one-pot meals can often be prepared with relatively little hands-on work.

    For families with packed schedules, being able to prepare ingredients ahead of time can make dinner considerably easier.

    What to look for:

    • A capacity appropriate for your household.
    • Simple temperature controls.
    • A removable insert that’s easy to clean.
    • A reliable lid and convenient handles.

    Always follow the recipe and appliance instructions for safe cooking temperatures, food preparation, and handling.

    Quick tip: Set up your ingredients the evening before and refrigerate them safely. In the morning, you’ll have fewer steps between you and a meal that’s ready later in the day.

    9. Blender

    A blender can do more than make smoothies.

    Depending on the model, it can help prepare sauces, dressings, soups, and other blended ingredients.

    It’s also useful for mixing fruits, yogurt, and other smoothie ingredients when you need a quick breakfast or snack.

    What to look for:

    • Enough power for the foods you’ll prepare.
    • A container size that fits your needs.
    • Controls that are simple to operate.
    • Parts that are easy to wash.

    Quick tip: Portion smoothie ingredients into freezer-safe bags or containers ahead of time. When you’re ready, you’ll have less measuring and preparation to do.

    10. Reusable Freezer Bags

    Reusable freezer bags can help organize ingredients, store portions, and reduce reliance on disposable bags.

    They’re especially handy for portioning ingredients before freezing them.

    You can use them for chopped vegetables, fruit, or other foods, provided the bags are designed for that use.

    What to look for:

    • Food-safe materials.
    • Secure seals.
    • Freezer compatibility.
    • Easy cleaning and drying.
    • Sizes that work for your household.

    Quick tip: Label bags with the contents and date. Freezer organization gets a lot easier when you don’t have to guess whether a bag contains strawberries or tomato sauce.


    The Extra Mile: Your 20-Minute Kitchen Meal Prep Reset

    Having the right kitchen tools helps, but having a simple routine makes those tools even more useful.

    Here’s a practical way to get started.

    First 5 minutes: Make a plan

    Choose two or three meals you’d like to prepare for the coming week.

    Check your refrigerator, freezer, and pantry before making a grocery list.

    Next 7 minutes: Prepare ingredients

    Wash produce, gather utensils, and chop or portion ingredients you’ll need.

    Separate raw meat from foods that won’t be cooked, and clean preparation surfaces appropriately.

    Final 8 minutes: Organize and store

    Place ingredients into appropriate containers, label them, and refrigerate or freeze perishables promptly.

    Finish by putting tools away and cleaning your preparation area.

    Don’t worry if your first attempt takes longer than 20 minutes. The idea is to develop a manageable routine, not race the kitchen clock.

    Free download: Kitchen Meal Prep — Your Extra Mile Checklist

    The downloadable checklist includes all 10 kitchen tools, a short preparation plan, and space to write down the meals you’re preparing.

    Final Thoughts

    Meal preparation doesn’t need to involve complicated recipes, fancy appliances, or spending your entire Sunday in the kitchen.

    A few dependable tools and a little planning can make cooking feel much less overwhelming.

    You don’t have to buy everything on this list, either.

    Start with the basics. Consider which tasks take the most time in your kitchen, and choose tools that actually solve those problems.

    Because the best kitchen gadget isn’t necessarily the one with the most features.

    It’s the one you’ll actually use.

    Command & Simplify — Practical Tools for a Simpler Life.

  • 10 Things to Organize This Weekend

    10 Things to Organize This Weekend

    Small steps. Big difference. A more organized home, a calmer mind, and a happier you.

    If your home has felt a little cluttered, scattered, or just plain annoying lately, you’re not alone.

    Sometimes the mess isn’t outrageous. It’s just enough to make daily life feel harder than it needs to.

    A junk drawer that won’t close. A pantry full of things nobody can find. A garage that looks like it might contain both Christmas decorations and a missing civilization.

    The good news?

    You do not need to reorganize your entire life this weekend.

    You just need a few small wins.

    Here are 10 practical areas to organize that can make your home feel calmer, cleaner, and easier to live in.

    1. Closet

    Closets fill up fast with clothes we don’t wear, shoes we forgot we owned, and random items that somehow ended up there because we were “putting them away for now.”

    Take a little time to sort through one closet.

    • Remove clothes you no longer wear.
    • Set aside anything that no longer fits or serves you.
    • Group similar items together.
    • Keep what you actually use and love.

    Quick tip: If you haven’t worn it in a long time, it’s probably not your favorite anymore.

    2. Kitchen Drawers

    Kitchen drawers can go from organized to chaotic in record time.

    Utensils get mixed together, duplicates pile up, and before you know it, you’re digging through three spatulas and a mystery gadget just to find a can opener.

    This weekend, pick one or two kitchen drawers and:

    • Remove everything.
    • Toss broken or unnecessary items.
    • Group similar utensils together.
    • Use dividers if helpful.

    Quick tip: You probably do not need six vegetable peelers. Unless you’re running a potato festival.

    3. Pantry

    A disorganized pantry makes cooking more stressful and grocery shopping more confusing.

    Start by checking expiration dates, duplicate items, open packages, and foods you no longer use.

    Then organize everything into categories. Keep baking products together, vitamins in their own designated area, cereals in another, and snacks where everyone can find them.

    We really like using organizational bins.

    Bins keep similar items together and contained. They’re especially convenient because you can grab an entire bin of snacks or spices, take everything off the shelf at once, find what you need, and slide the whole bin right back into place.

    Another favorite? Lazy Susans.

    They’re fantastic for sauces, cooking oils, vinegars, and other bottles that tend to get lost in the back of the pantry. Give one a spin instead of moving six bottles to reach the one you want.

    Quick tip: Group items by how you actually use them, not just how they look. A practical pantry beats a picture-perfect pantry every time.

    4. Bathroom

    Bathrooms collect clutter too—half-used products, old toiletries, expired items, and things shoved in drawers because there was nowhere else to put them.

    Choose one bathroom area and:

    • Remove expired products.
    • Throw away empty containers.
    • Wipe down shelves and drawers.
    • Keep everyday essentials neat and accessible.

    Quick tip: Organizing the bathroom is one of those jobs that never sounds exciting but always feels good when it’s done.

    5. Garage

    The garage. A place where things sometimes seem to go and die.

    Old tools, broken equipment, empty boxes, unused sports gear, and random items that somehow became permanent residents.

    Chances are, there’s quite a bit in there you don’t actually need anymore.

    Start there.

    Before buying shelves, bins, or storage racks, go through one section and figure out what you can get rid of.

    • Throw away things that are broken beyond repair.
    • Set aside usable items to donate or sell.
    • Group tools, sports equipment, and seasonal supplies together.
    • Create designated spots for the things you’re keeping.
    • Keep walkways clear and store hazardous materials safely.

    You don’t have to reorganize the entire garage in one weekend. Just reclaim one section.

    Quick tip: Getting rid of unnecessary stuff before organizing the rest means you’ll have less to store—and possibly discover that you already have enough shelving.

    6. Paperwork

    Paper piles create stress fast.

    Bills, school forms, manuals, receipts, insurance documents, and random papers all seem small—until they become a mountain.

    Here’s a simple approach that works well for us:

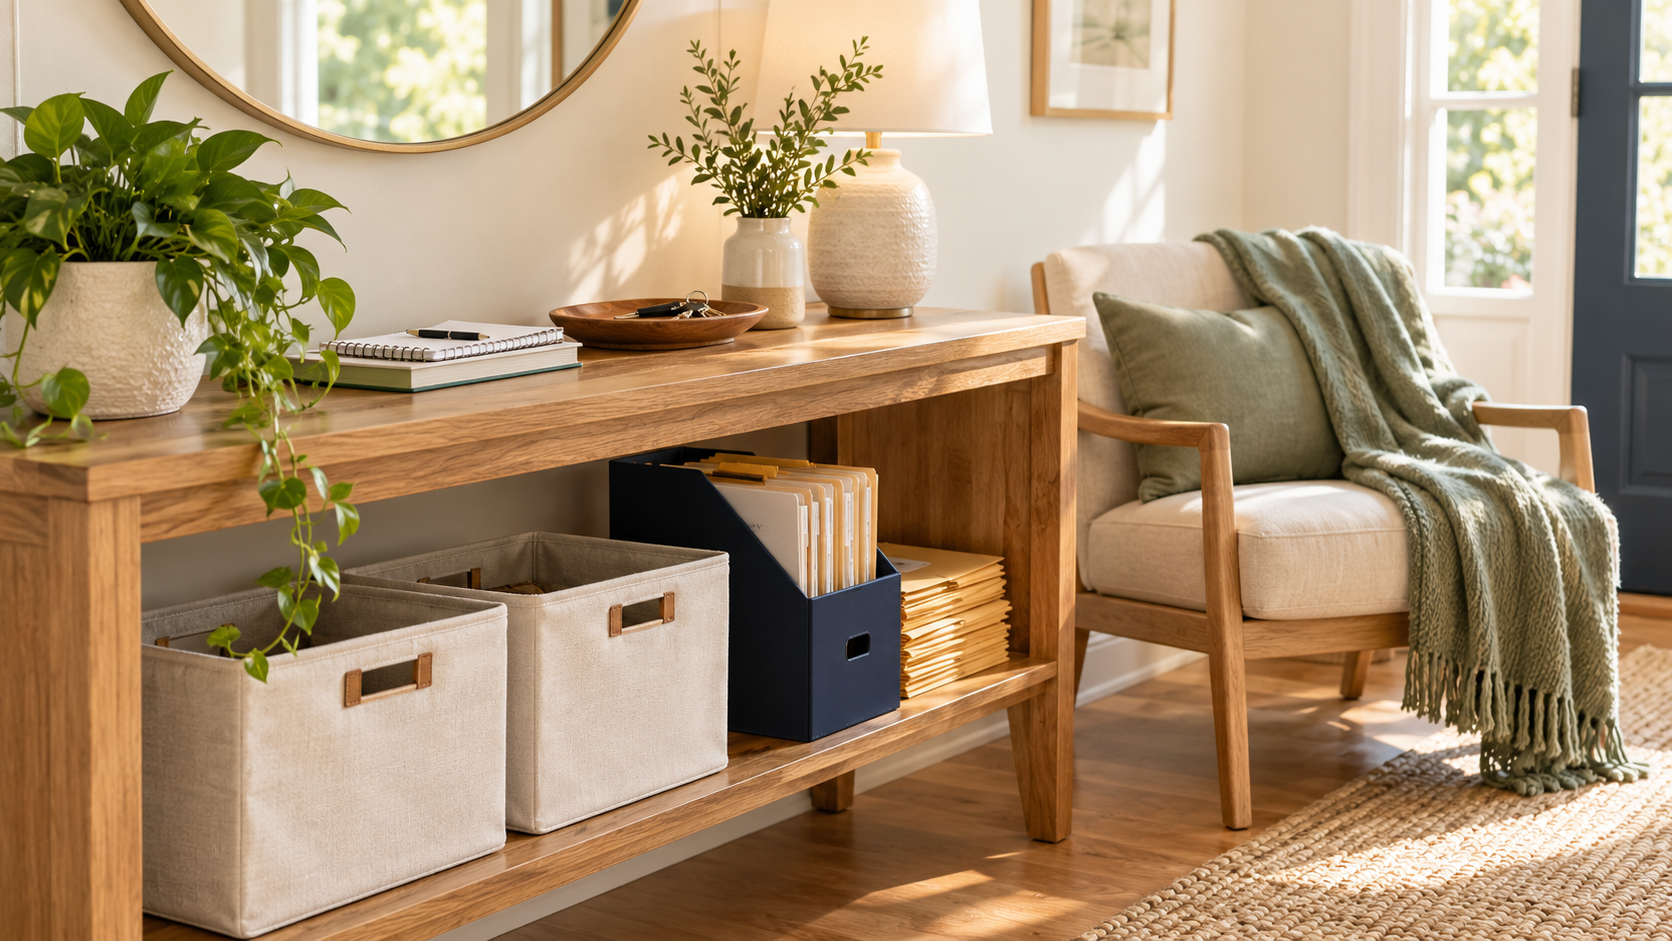
    Manila envelopes and heavy-duty, quick-setup storage boxes.

    Manila envelopes are great for keeping related documents together. Label them by category—taxes, insurance, medical records, warranties, household paperwork, or whatever makes sense for your family.

    Then place the envelopes inside sturdy storage boxes that are easy to assemble, label, and access.

    You can sort paperwork into:

    There’s no need for an elaborate filing cabinet if a few labeled envelopes and boxes do the job.

    You can also scan appropriate documents and reduce unnecessary paper clutter, while securely storing originals that need to be kept.

    Quick tip: A simple filing system that you’ll actually use is much better than an expensive one you won’t.

    7. Junk Drawer

    Let’s be honest.

    The junk drawer is rarely junk-free.

    It usually contains batteries, pens, tape, clips, takeout menus, rubber bands, receipts, mystery cords, and possibly one item that belongs in every room of the house.

    Go through it and:

    • Throw away actual trash.
    • Remove items that belong elsewhere.
    • Group useful items together.
    • Keep only what you really need.

    Quick tip: A junk drawer is fine. A junk drawer with standards is even better.

    8. Car

    Organizing the car can be a pain, especially if it’s been collecting sports equipment, wrappers, papers, toys, and other miscellaneous items for months.

    Here’s a method that really helps.

    It stinks to do it, but take everything out of the car first.

    Everything.

    Empty the trunk, center console, glove box, door pockets, and any other storage areas.

    Then clean the interior and start putting things back where they belong.

    I guarantee you’ll find that a lot less goes back into the car than what came out.

    As you put things back, think about what you actually need:

    • Registration and insurance information.
    • A phone charger.
    • Tissues or wipes.
    • A small emergency kit.
    • A designated place for everyday necessities.

    Keep loose objects secured so they don’t become hazards during a sudden stop.

    Quick tip: Give yourself a clean slate. It’s much easier to keep the car organized when you aren’t constantly shifting clutter from one seat to another.

    9. Digital Files

    Not all clutter is visible.

    Digital clutter can be just as frustrating as physical clutter.

    Messy desktops, packed downloads folders, duplicate photos, and random files can make your devices harder to use.

    This weekend, spend a little time to:

    • Organize photos.
    • Clean up files.
    • Delete what you no longer need.
    • Create a few simple folders.

    Make sure important files are backed up before deleting copies.

    Quick tip: If your computer desktop looks like a yard sale, this is your sign.

    10. A Space Just for You

    This one matters.

    Not every space you organize has to be about productivity.

    Create one clean, comfortable space that feels peaceful to you.

    It could be:

    • A chair and small table.
    • A reading corner.
    • A prayer space.
    • A place to journal.
    • A quiet area to sit and breathe.

    The point is to create a small area where you can relax, refresh, and recharge.

    Quick tip: A more peaceful you is good for everyone around you too.


    The Extra Mile: Weekend Organization Reset

    If you want to turn this into a practical weekend win, don’t try to do all 10.

    Pick three.

    That’s enough to create momentum without making yourself miserable.

    Weekend Organization Checklist

    • ☐ Closet
    • ☐ Kitchen drawers
    • ☐ Pantry
    • ☐ Bathroom
    • ☐ Garage
    • ☐ Paperwork
    • ☐ Junk drawer
    • ☐ Car
    • ☐ Digital files
    • ☐ A space just for you

    My top 3 this weekend:

    1. __________________________
    2. __________________________
    3. __________________________

    One area that already feels better:

    __________________________

    Final Thoughts

    Clearing clutter brings a wonderful mix of relief, calm, and mental clarity.

    There’s something satisfying about walking into a room, opening a drawer, or getting into your car and seeing everything in its place.

    And here’s another benefit: you might even put a little money in your pocket.

    Some of those things you no longer need could be sold. Others could be donated to someone who can actually use them.

    Making a little extra money feels great. So does knowing that something you no longer need might help someone else.

    Right?

    Organizing your home isn’t about impressing anyone or creating a picture-perfect house.

    It’s about making everyday life simpler, calmer, and more manageable.

    Start small. Pick a few areas. Keep it practical.

    Small steps really can make a big difference.

    Command & Simplify — Practical Tools for a Simpler Life.

  • Family Road Trip Emergency Kit: 12 Essentials You’ll Be Glad You Packed

    Family Road Trip Emergency Kit: 12 Essentials You’ll Be Glad You Packed

    Be prepared. Travel safer. Enjoy the journey.

    There’s something special about loading up the family, hitting the open road, and heading toward your next adventure.

    Maybe you’re driving across the state to visit relatives, spending a week exploring national parks, or embarking on that long-awaited family vacation (remember the Griswolds’ trip to Wally World?)

    You’ve packed the suitcases, booked the hotel, and loaded enough snacks to feed a small army.

    But have you prepared for the unexpected?

    A dead battery, flat tire, unexpected storm, or vehicle breakdown can quickly turn a fun road trip into a stressful experience—especially when the kids are along for the ride.

    The good news is that a little preparation can make these situations easier to handle.

    Here are 12 useful emergency supplies every family should consider packing before hitting the road.

    1. Portable Jump Starter

    A dead battery can leave you stranded in a parking lot, campground, or unfamiliar town.

    A portable battery jump starter can help get your vehicle running again without needing another vehicle nearby.

    Many models are compact enough to fit in a storage bag.

    Quick tip: Choose a jump starter rated for your vehicle’s engine, learn how to use it before your trip, and follow the manufacturer’s safety instructions. Check its charge regularly.

    A jump starter isn’t something you’ll necessarily use often. But when you need it, you’ll be very glad it’s there.

    2. Portable Tire Inflator

    Low tire pressure can become a problem when you’re far from a gas station or traveling through an unfamiliar area.

    A portable tire inflator lets you add air to a tire without searching for the nearest air pump.

    Some models plug into your vehicle’s 12-volt outlet, while others operate using rechargeable batteries.

    Quick tip: Know your vehicle’s recommended tire pressure, usually listed on the driver’s door-jamb label. Check pressure when the tires are cold.

    An inflator can help with minor pressure loss, but it doesn’t repair a damaged tire. If you suspect serious tire damage or a rapid air leak, stop somewhere safe and arrange assistance.

    3. First Aid Kit

    Minor scrapes, cuts, and blisters can happen just about anywhere.

    A basic first aid kit is useful for road trips, campground visits, outdoor adventures, and everyday travel.

    Consider including adhesive bandages, sterile gauze, antiseptic wipes, disposable gloves, medical tape, and tweezers.

    Quick tip: Customize your kit for your family. Keep necessary medications and medical supplies accessible, follow their storage requirements, and check expiration dates before each major trip.

    A basic kit helps with minor injuries. Significant injuries require appropriate medical attention.

    4. Flashlight

    A flashlight becomes especially valuable when something goes wrong after dark.

    It can help you find supplies, inspect an area safely, or locate items in the vehicle during a nighttime stop.

    Choose a durable flashlight that’s easy to operate.

    Quick tip: Keep spare batteries or maintain the charge on rechargeable models.

    And don’t rely exclusively on your phone’s flashlight. You may need your phone for calling roadside assistance, navigation, or contacting family.

    5. Portable Power Bank

    Today’s phones do much more than make calls.

    We rely on them for navigation, hotel reservations, emergency contacts, weather updates, and communication.

    A charged portable power bank can keep important devices running if your vehicle loses power or you can’t reach an outlet.

    Quick tip: Charge your power bank before departure and pack the correct charging cables.

    Store it according to the manufacturer’s recommendations, and don’t leave lithium-ion battery packs exposed to excessive heat.

    6. Emergency Blanket

    A compact emergency blanket takes up very little room but can provide an extra layer of protection from wind and heat loss while waiting for assistance.

    Reflective emergency blankets are lightweight and easy to store.

    Quick tip: Pack enough suitable warming supplies for everyone traveling.

    In cold weather, a lightweight emergency blanket should supplement—not replace—proper coats, hats, gloves, and warm blankets.

    7. Rain Ponchos

    Unexpected rain can make an already inconvenient roadside situation even more uncomfortable.

    Lightweight rain ponchos are inexpensive, compact, and useful beyond emergencies.

    They can also come in handy during theme-park visits, outdoor attractions, and sudden storms.

    Quick tip: Keep one appropriately sized poncho for each family member.

    If your vehicle breaks down in dangerous roadside conditions, don’t assume it’s safe to get out or work on the vehicle. Follow roadside-assistance guidance and prioritize everyone’s safety.

    8. Basic Tool Kit

    A compact tool kit can help with minor adjustments and simple tasks during a trip.

    Consider basic items such as screwdrivers, pliers, an adjustable wrench, work gloves, and a small roll of duct tape.

    Quick tip: Choose a compact kit designed for vehicle storage, and familiarize yourself with its contents before leaving home.

    You don’t need to become a roadside mechanic. If a repair involves traffic exposure, an unstable vehicle, or unfamiliar mechanical work, call for professional assistance.

    9. Drinking Water

    Water is essential on any road trip, but it becomes even more important if unexpected delays leave your family waiting for help.

    Pack enough drinking water for everyone, with additional supplies appropriate for your route, weather, and travel conditions.

    Quick tip: Keep water somewhere accessible instead of burying it beneath the luggage.

    Check stored supplies regularly. Extreme temperatures can affect containers and water quality, so rotate your emergency stock as appropriate.

    10. Nonperishable Snacks

    There aren’t always convenient food options when you’re stranded or delayed.

    Pack a small supply of nonperishable snacks that your family will actually eat.

    Good options include protein bars, dried fruit, crackers, nuts when allergies permit, and appropriately stored jerky.

    Quick tip: Rotate snacks regularly, check expiration dates, and choose age-appropriate items for younger children.

    A hungry child in the back seat can make a two-hour delay feel significantly longer. Sometimes the emergency isn’t mechanical—it’s that everyone is hungry!

    11. Phone Car Charger

    A portable power bank is useful backup power, but a dedicated vehicle charger is equally important.

    A working USB car charger allows you to maintain your phone’s charge during the trip.

    Quick tip: Keep a charging cable permanently in the car, along with the correct adapter for your family’s devices.

    Before leaving, test the charger rather than assuming it works.

    It’s a small thing that can make a big difference when you’re depending on navigation or need to contact someone.

    12. Extra Clothes

    An unexpected overnight stay, cold weather, rain, or a messy roadside situation can make extra clothing extremely useful.

    Keep a small bag with spare socks, comfortable clothes, and weather-appropriate layers.

    For longer trips, consider including shoes suitable for walking.

    Quick tip: Use a packing cube or labeled bag so you can find everything quickly.

    If you’re traveling with young children, you already know that extra clothing has a way of becoming necessary even when absolutely nothing goes wrong with the vehicle.


    The Extra Mile: Build a Grab-and-Go Road Trip Emergency Kit

    Here’s a simple way to keep everything organized without turning your trunk into a traveling hardware store.

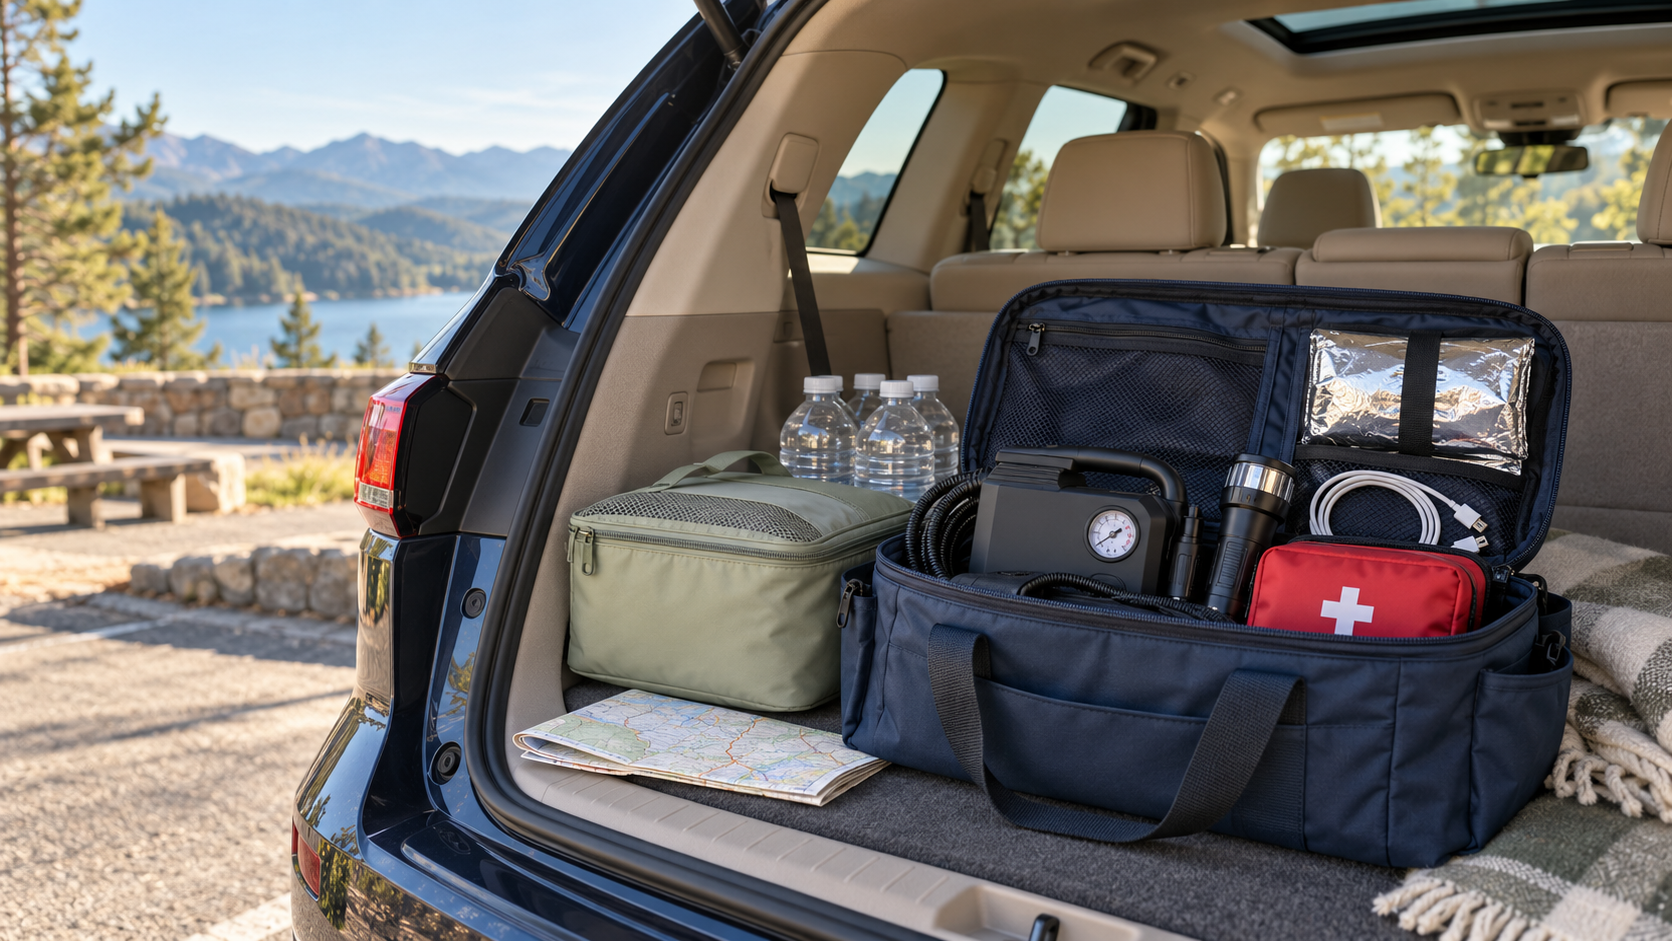
    Use a sturdy, portable storage bin or emergency bag to organize your supplies.

    Divide your kit into three sections:

    Vehicle and roadside supplies: Jump starter, tire inflator, tool kit, flashlight.

    Comfort and weather supplies: Emergency blankets, ponchos, extra clothes.

    Family essentials: First aid kit, drinking water, snacks, phone charger, and power bank.

    Keep the kit secured so it can’t become a projectile during sudden braking.

    One of the biggest advantages of a portable kit is that you can remove it when you need the cargo space. Just remember to put it back before your next trip.

    You can also use the same kit for family vacations, sports tournaments, camping trips, and weekend getaways.

    Your Road Trip Emergency Kit Checklist

    • ☐ Portable jump starter — charged and compatible with your vehicle
    • ☐ Portable tire inflator
    • ☐ First aid kit — stocked and checked
    • ☐ Flashlight — working, with batteries or charge
    • ☐ Portable power bank — charged
    • ☐ Emergency blankets and weather-appropriate warming supplies
    • ☐ Rain ponchos for the family
    • ☐ Compact basic tool kit
    • ☐ Drinking water
    • ☐ Nonperishable snacks
    • ☐ Phone car charger and cables
    • ☐ Extra clothes and socks

    Bonus items worth considering: Reflective warning triangles, a high-visibility vest, roadside-assistance information, a tire-pressure gauge, paper maps, and seasonal equipment.

    For winter travel, consider an ice scraper, small shovel, traction material, boots, and additional warm clothing.

    Before You Leave: The 10-Minute Road Trip Safety Check

    An emergency kit is important, but preparing the vehicle matters just as much.

    Before a major trip, take a few minutes to check:

    • ☐ Tire condition, tread, and recommended pressure
    • ☐ Spare tire or tire-repair equipment, where applicable
    • ☐ Fuel level or electric-vehicle charging plan
    • ☐ Headlights, brake lights, and turn signals
    • ☐ Windshield wipers and washer fluid
    • ☐ Weather and road conditions along your route
    • ☐ Current vehicle maintenance needs
    • ☐ Roadside-assistance and insurance contact information
    • ☐ Your destination address saved in your phone’s maps app
    • ☐ Emergency supplies secured and accessible

    This quick check isn’t a replacement for regular maintenance or a professional vehicle inspection. It’s simply another way to reduce avoidable surprises.

    One More Tip: Prepare for the Unexpected Stop

    If your vehicle breaks down, your first priority is keeping everyone safe.

    Move out of traffic to a safe location when possible, activate your hazard lights, and call roadside assistance or emergency services as appropriate.

    Never attempt a tire change or other repair in an unsafe roadside location.

    If you’re traveling with children, help them understand that they should remain in a safe place and follow your directions during an emergency.

    The goal isn’t to scare anyone. It’s to make sure the entire family knows what to do if plans suddenly change.

    Road Trips Should Be About Making Memories

    No one leaves home hoping to use their emergency kit.

    Ideally, you’ll complete an entire vacation without touching most of these supplies.

    But when unexpected situations happen, having the right equipment can help reduce confusion and make it easier to respond safely.

    You don’t need to buy everything at once. Start with the essentials, build your kit over time, and check it before major trips.

    Small items. Big peace of mind.

    Because the best part of a family road trip should be the memories you make—not the roadside problems you weren’t prepared for.

    As John Lennon said, “Life is what happens while you are busy making other plans.”

    Command & Simplify — Practical Tools for a Simpler Life.

  • 10 Simple Ways to Keep Pests Out of Your Home

    10 Simple Ways to Keep Pests Out of Your Home

    Practical prevention tips from a former pest-control business owner

    Nobody likes discovering ants marching across the kitchen counter, spiders making themselves comfortable in the garage, or mice treating the attic like their own personal vacation rental.

    And while pest-control products certainly have their place, here’s something homeowners should understand:

    One of the best ways to deal with pest problems is to prevent them from developing in the first place.

    After approximately 30 years working in pest control, including 13 years owning my own pest-control company, I learned that many pest problems begin with surprisingly ordinary conditions.

    Dirty dishes in the sink. Crumbs on the counter. A leaking faucet. A small opening around a pipe. An overflowing trash can.

    Pests are constantly looking for opportunities. Our job is to make the house a less inviting place to settle.

    Here are 10 practical ways to help protect your home.

    1. Keep Your Home Clean

    One of the first things I want homeowners to understand about pest prevention is the importance of overall cleanliness.

    Food crumbs, grease, spills, dirty dishes, and garbage can provide pests with a steady food source.

    You don’t need a spotless, magazine-worthy home. But maintaining a clean kitchen, bathroom, and living environment can go a long way toward discouraging pest activity.

    Make these simple habits part of your routine:

    • Wipe down kitchen counters and clean up crumbs and spills.
    • Keep your stove and stovetop clean. Grease and food residue can accumulate around burners and beneath appliances.
    • Wash dishes regularly. Avoid leaving dirty plates, pans, and food-filled dishes sitting in the sink overnight.
    • Clean your kitchen sink. Remove food scraps, rinse the drain area, and wipe down surrounding surfaces.
    • Keep toilets and bathrooms clean. Regularly clean toilet bowls, the surrounding floor, and bathroom surfaces. Check for leaks and unnecessary moisture.
    • Sweep and vacuum regularly, especially beneath dining tables and around areas where people eat.
    • Store food properly, including pet food, in sealed containers.
    • Empty garbage regularly and clean trash cans when food residue accumulates.

    My tip: Before going to bed, take five minutes to clean the kitchen counters, stove, and sink. Put away food and take care of the dirty dishes.

    It’s a small habit that can help eliminate the food sources attracting unwanted visitors.

    And remember: Even a very clean home can experience pest problems. Cleanliness is an important part of prevention, but it works best alongside sealing entry points, managing moisture, and maintaining the property.

    2. Seal Cracks, Gaps, and Entry Points

    Pests don’t need an open front door to get inside.

    Ants and other small insects can enter through tiny cracks around windows, foundations, siding, and utility lines. Rodents can squeeze through surprisingly small openings.

    In fact, a mouse can fit through a hole about the width of a pencil.

    Walk around your home’s exterior and look carefully at:

    • Gaps around plumbing and electrical lines
    • Cracks in the foundation
    • Openings around doors and windows
    • Damaged siding and trim
    • Gaps near vents, soffits, and rooflines

    Seal appropriate openings with durable materials suited to the location. For potential rodent entry points, use rodent-resistant materials such as metal mesh or flashing rather than relying on ordinary foam alone.

    My tip: Pay special attention to where different building materials meet. Those transitions can create hidden openings.

    Also, don’t seal active animal-entry points without checking for trapped animals, and never block required ventilation or exhaust openings.

    3. Check Your Doors and Windows

    A door that doesn’t seal properly can provide pests with an easy entrance.

    Inspect the weatherstripping around exterior doors and check the door sweep along the bottom.

    If you can see daylight through a closed exterior door, it’s time to investigate.

    Window screens deserve attention, too.

    Look for torn screens, loose frames, and gaps around window openings.

    My tip: Don’t forget the door between your garage and living space. That door should close and seal properly, both for pest prevention and home safety.

    4. Eliminate Unnecessary Moisture

    Water is one of the biggest factors that can make a property attractive to pests.

    Cockroaches, ants, mosquitoes, and various other pests may take advantage of moisture around your home.

    Inspect for:

    • Leaking faucets and plumbing connections
    • Moisture beneath sinks
    • Damp basements and crawl spaces
    • Clogged gutters
    • Standing water around the foundation
    • Water collecting in outdoor containers

    Repair leaks and correct drainage problems rather than simply cleaning up the visible water.

    My tip: Pay attention to recurring moisture. If the same spot keeps getting wet, there’s probably a reason—and the problem won’t fix itself.

    5. Keep Trees and Shrubs Away From the House

    Vegetation can provide shelter and pathways for pests.

    Branches touching the roof or siding can help some pests access areas they might not reach as easily otherwise.

    Dense shrubs and vegetation also make it harder to inspect the foundation and exterior walls.

    Trim branches and shrubs where practical, while keeping plants healthy and maintaining proper landscaping practices.

    My tip: You should be able to walk around your home and inspect the exterior without fighting your way through a jungle.

    If branches are near electrical lines or require unsafe ladder work, hire a qualified professional.

    6. Keep Firewood, Debris, and Stored Items Organized

    Woodpiles, old lumber, leaf piles, and unused materials can provide shelter for insects and rodents.

    That doesn’t mean you need a perfectly spotless yard.

    But it does mean you should avoid letting clutter collect against the house.

    Store firewood off the ground and away from exterior walls when possible.

    Remove unnecessary debris and avoid leaving cardboard, lumber, and miscellaneous materials piled up indefinitely.

    My tip: If you haven’t looked behind something in several years, it’s probably worth moving it and seeing what’s going on. Watch out!

    You may discover a pest problem—or that garden tool you’ve been looking for since 2022.

    7. Manage Your Garbage

    Garbage can attract flies, rodents, ants, and other pests.

    Use trash containers with properly fitting lids, empty them regularly, and clean up spills or food residue.

    Pay attention to outdoor garbage bins, especially during warmer weather.

    If possible, keep them away from exterior doors and avoid placing them directly against the house.

    My tip: Occasionally wash your outdoor trash bins. You might be surprised how much food residue collects at the bottom.

    It’s not a glamorous weekend project, but neither is dealing with a mouse infestation.

    8. Inspect Your Garage

    Garages are easy to overlook when thinking about pest prevention.

    They’re frequently opened, often contain stored items, and may have gaps around doors or utility connections.

    Inspect the garage door’s bottom seal and side weatherstripping.

    Check behind storage bins, shelves, and equipment.

    Keep pet food, birdseed, and other potential food sources in secure containers.

    My tip: If your garage door doesn’t close tightly against the ground, take a closer look at the seal.

    Also check the condition of the connecting door to the house. A pest that enters the garage shouldn’t have a second easy route indoors.

    9. Inspect Items Before Bringing Them Inside

    Not every pest enters through a crack in the wall.

    Some arrive with groceries, packages, boxes, furniture, plants, or stored belongings. Roaches and silverfish are notorious for getting in this way. Silverfish will infest cardboard boxes filled with books and magazines and linen closets filled with sheets and towels.

    Inspect secondhand furniture carefully, particularly upholstered items.

    Check boxes and stored materials for signs of insect activity.

    Be especially cautious with belongings coming from locations where pest activity is known or suspected.

    My tip: Cardboard boxes make convenient storage containers, but they’re not always the best choice for long-term storage in damp basements or garages.

    Durable, lidded storage containers are often easier to inspect and keep clean.

    10. Make Pest Prevention Part of Your Home Maintenance Routine

    This may be the most important tip of all.

    Pest prevention works best when it becomes an ongoing habit instead of something you think about only after pests appear.

    A few times each year, walk around your property and look for changes.

    Has a door seal deteriorated?

    Is a gutter overflowing?

    Have branches grown against the roof?

    Is there moisture beneath a sink?

    Has a new opening appeared around a utility line?

    Addressing small issues early can help prevent larger problems later.

    My tip: Don’t just look for pests. Look for the conditions that make it easier for pests to get inside and stay there.

    That’s the mindset behind good pest prevention.


    The Extra Mile: Your 15-Minute Home Pest-Prevention Inspection

    You don’t need an elaborate inspection system to get started.

    Set aside 15 minutes and check the following areas.

    Outside Your Home

    • ☐ Check exterior doors and weatherstripping.
    • ☐ Look for visible openings around pipes and utility lines.
    • ☐ Inspect accessible window screens.
    • ☐ Look for standing water and drainage problems.
    • ☐ Check vegetation touching siding or rooflines.
    • ☐ Move unnecessary clutter away from the foundation.
    • ☐ Make sure outdoor trash containers close properly.

    Inside Your Home

    • ☐ Wipe down counters and check for food crumbs or spills.
    • ☐ Clean the stove, kitchen sink, and surrounding surfaces.
    • ☐ Wash dirty dishes and put leftover food away.
    • ☐ Clean toilets and check bathroom surfaces for moisture.
    • ☐ Check beneath kitchen and bathroom sinks for leaks.
    • ☐ Inspect pantry and pet-food storage.
    • ☐ Check accessible garage corners and storage areas.
    • ☐ Look for droppings, gnaw marks, insect trails, or other unusual activity.

    Three Questions to Ask Yourself

    1. Where could pests enter?

    Look for openings, damaged seals, and other access points.

    2. What could attract them?

    Think about food, moisture, and shelter.

    3. What can I correct this week?

    Choose the most important one or two problems and address those first.

    You don’t have to tackle everything in a single afternoon.

    Remember: small maintenance habits can prevent larger headaches.


    Should You Spray Around Your House?

    Homeowners often assume that preventing pests means spraying insecticide around the entire property.

    But spraying isn’t a substitute for fixing entry points, moisture problems, or food sources.

    Effective pest management starts with identifying the pest and understanding what’s attracting it.

    Sometimes prevention and simple repairs are enough. Other situations require traps, baits, targeted treatment, or professional assistance.

    If you choose to use a pesticide, make sure it is labeled for the specific pest and application site. Follow all label directions and keep products and treated areas appropriately secured from children and pets.

    Avoid using more product than directed or combining chemicals in ways the labels don’t permit.

    My advice: Start by figuring out why the pest is there. That’s often more useful than immediately reaching for a spray bottle.

    Already Have Ants in the House?

    Preventing pests is one thing. Dealing with an active infestation is another.

    If you’re already seeing ants indoors, we have a separate guide covering what to look for and how to approach the problem.

    Read our related article:

    I Have Ants in My House. What Should I Do? A Former Pest Control Owner’s Guide.

    Final Thoughts

    You can’t guarantee that a home will never have a pest problem.

    But you can make your home much less attractive and accessible to unwanted visitors.

    Keep your living spaces clean. Seal openings. Manage moisture. Store food properly. Maintain the exterior. Inspect the areas that are easy to forget.

    The little things matter.

    And here’s something I learned from years of working in pest control:

    Good pest prevention isn’t just about getting rid of bugs. It’s about taking care of your home before small problems become bigger ones.

    Command & Simplify — Practical Tools for a Simpler Life.

  • 12 Things Every Sports Parent Should Keep in the Car

    12 Things Every Sports Parent Should Keep in the Car

    Be ready. Stay prepared. Enjoy the game.

    If you’re a sports parent, you already know that a quick trip to your child’s game can turn into an all-day adventure.

    One minute you’re heading to a basketball game. The next, you’re searching for a missing water bottle, dealing with a surprise rainstorm, or discovering that somebody forgot their sweatshirt.

    And somehow, it’s always five minutes before the game starts.

    The good news? A little preparation can make sports weekends much easier.

    Whether your family spends weekends at soccer fields, baseball diamonds, basketball tournaments, or outdoor sporting events, keeping a few essentials in your vehicle can save time, reduce stress, and help everyone enjoy the experience.

    Here are 12 practical things every sports parent should consider keeping in the car.

    1. Reusable Water Bottles

    Between practices, games, and tournaments, staying hydrated matters for both athletes and spectators.

    Keep a few reusable water bottles ready to fill before leaving home.

    Quick tip: Give each family member a designated bottle. It makes figuring out whose bottle belongs to whom a whole lot easier.

    2. Healthy Snacks

    Long tournament days don’t always leave enough time for proper meals. Having nutritious, convenient snacks ready can help keep everyone fueled between games.

    Some great options include:

    • Beef sticks and beef jerky
    • Protein bars
    • Apples with peanut butter
    • Bananas, oranges, and other fresh fruit
    • Trail mix or nuts, when allergies permit
    • Whole-grain crackers and pretzels
    • Hummus with carrots, celery, or crackers
    • Cheese sticks, yogurt, and other refrigerated snacks

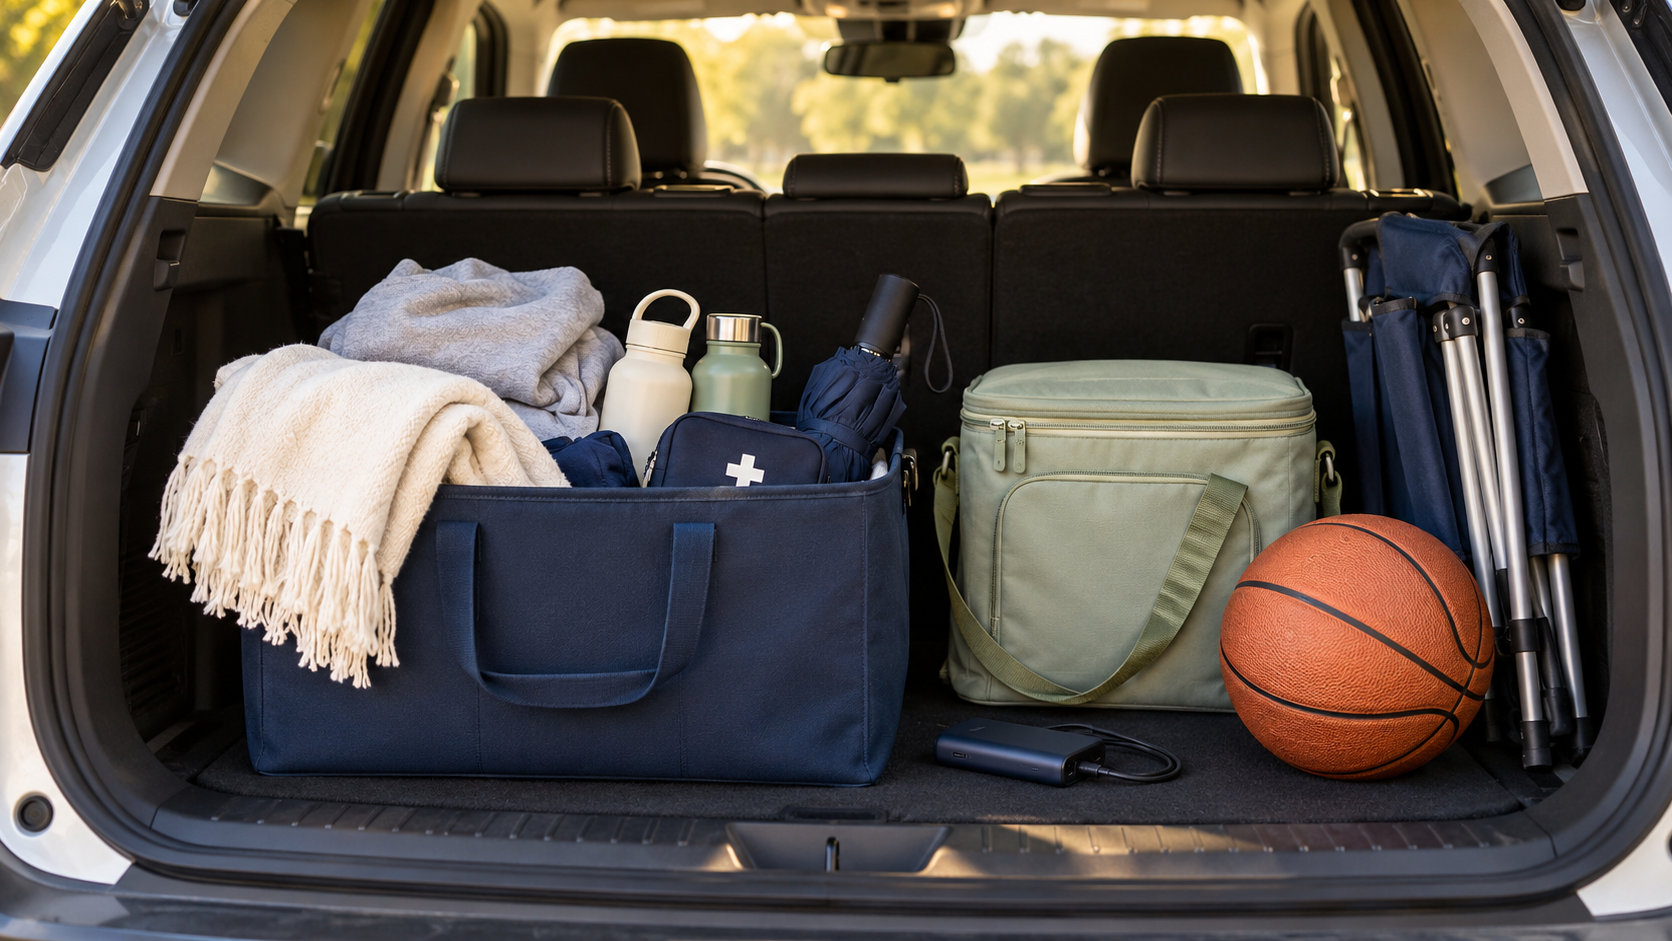
    Bring a small cooler! An insulated cooler with frozen ice blocks is perfect for snacks that need to stay cold, such as hummus, cheese, yogurt, and certain meat products. Keep perishable foods at 40°F or below.

    For younger children, choose age-appropriate foods and check for any food allergies or team restrictions.

    Quick tip: Prepare your snack cooler the night before. It saves time in the morning and helps you avoid another expensive trip to the concession stand. Those trips add up!

    3. Extra Clothes

    You never know when the weather will change, someone will spill a drink, or your child will finish a game looking like they’ve been wrestling in a mud pit.

    Keep a change of clothes or a few spare essentials readily available.

    Consider socks, a sweatshirt, a shirt, and an extra pair of shorts.

    Quick tip: Use a labeled packing cube or drawstring bag to keep everything together.

    4. A Blanket

    A blanket is one of those items you may not think about until you’re sitting through a chilly early-morning game.

    Keep a lightweight blanket in your vehicle for cold bleachers, outdoor games, and unexpected weather changes.

    Quick tip: Choose something washable that folds compactly. After one muddy tournament weekend, you’ll understand why.

    5. A First Aid Kit

    Minor scrapes, blisters, and small cuts happen.

    A basic first aid kit can help you handle minor situations until further care is available.

    Useful supplies include adhesive bandages, sterile gauze, disposable gloves, antiseptic wipes, and blister bandages.

    Quick tip: Check the kit periodically and replace anything used or expired.

    For significant injuries, follow the event’s emergency procedures and seek appropriate medical care.

    6. Sunscreen

    Outdoor sporting events can mean hours of sun exposure, even when the temperature feels comfortable.

    Pack broad-spectrum sunscreen with SPF 30 or higher and remember to reapply according to the product instructions.

    Quick tip: Keep sunscreen in your game-day bag rather than leaving it in a vehicle during extreme temperatures, which can affect product quality.

    7. Insect Repellent

    Mosquitoes and other biting insects don’t care whether your kid’s team is winning.

    For outdoor events, pack an EPA-registered insect repellent suitable for your family’s ages and needs.

    Always follow the product label, including any age restrictions and application instructions.

    Quick tip: Apply sunscreen first and insect repellent afterward. Don’t apply repellent to children’s hands, eyes, mouth, or irritated skin.

    8. An Umbrella

    Weather forecasts aren’t always perfect.

    A compact umbrella can make a rainy tournament day more manageable for spectators.

    You might also consider packing lightweight rain ponchos.

    Quick tip: Keep wet umbrellas and rain gear in a separate bag after the event so the rest of your belongings stay dry.

    9. Portable Folding Chair

    Not every field or venue has enough seating.

    A portable folding chair can make long games and tournament days considerably more comfortable.

    Look for something lightweight, sturdy, and easy to carry from the parking lot.

    Quick tip: If you’re buying a chair, consider one with a carrying strap and cup holder. Small conveniences matter when you’re carrying three bags and somebody else’s forgotten jacket.

    10. Portable Phone Charger

    Your phone does a lot of work during sports weekends.

    It holds schedules, directions, team messages, weather updates, and sometimes the digital tickets needed to enter an event.

    A portable power bank can help prevent your battery from dying at an inconvenient moment.

    Quick tip: Charge the power bank before the weekend and keep the correct charging cable with it.

    11. Trash Bags

    This might be the least exciting item on our list, but it’s one of the most useful.

    A small supply of trash bags helps you collect snack wrappers, muddy clothes, wet towels, and other messes.

    Quick tip: Keep a few in a resealable bag or small container in your trunk. You’ll be surprised how often you use them.

    12. Backup Sports Gear

    Forgotten equipment can turn an otherwise smooth morning into a stressful one.

    Depending on your child’s sport, consider keeping spare items such as socks, athletic tape, hair ties, an extra practice shirt, or an appropriately sized backup ball.

    You don’t need to carry an entire sporting goods store in your trunk.

    Quick tip: Make a short backup-gear checklist for each sport your children play. Restock your supplies at the end of each weekend.


    The Extra Mile: Create a Game-Day Grab-and-Go Bin

    Here’s a simple organization trick that can make all 12 essentials easier to manage.

    Place your regularly used supplies in one sturdy, portable storage bin or trunk organizer.

    Group the contents into three categories:

    Comfort: Blankets, chairs, extra clothes, umbrellas.

    Safety and weather: First aid kit, sunscreen, insect repellent.

    Everyday essentials: Water bottles, nonperishable snacks, phone charger, trash bags, backup gear.

    And here’s one of the biggest advantages of using a removable bin: When you need the extra space in your vehicle for groceries, luggage, or anything else, simply lift the entire bin out. Everything stays together, organized, and ready to go back into the car when you need it.

    No unloading 15 individual items. No wondering where you put everything.

    Before every sports weekend, take two minutes to check what needs to be refilled, washed, or recharged. Pack your cooler separately just before departure.

    You can also assign an age-appropriate job to each child: refill the water bottles, check the sports bag, or restock the snacks.

    After all, there’s no rule that says Mom or Dad must be the official manager of every single missing sock.

    A Quick Friday-Night Sports Parent Reset

    Before going to bed, run through these six checks:

    • Confirm game times, locations, and any schedule changes.
    • Enter the game or tournament address into your phone’s maps app and save the destination. That way, directions are ready when it’s time to leave.
    • Prepare uniforms, shoes, equipment, and weather-appropriate clothing.
    • Restock snacks, prepare the cooler supplies, and get water bottles ready.
    • Check your grab-and-go bin and charge your power bank.
    • Make sure everyone knows what time you’re leaving.

    A few minutes of preparation can prevent a surprising amount of last-minute frustration.

    Want to Organize the Entire Sports Weekend?

    Keeping your car stocked is a great start. But sports weekends involve more than equipment.

    There are game schedules, multiple children, travel arrangements, packing lists, driving responsibilities, and expenses to manage.

    That’s why we created the Weekend Sports & Activities Family Command Center.

    Our printable and digital family organization system helps you manage schedules, packing, travel information, driving coordination, weekend costs, and important reminders in one place.

    Explore the Weekend Sports & Activities Family Command Center:

    https://commandandsimplify.com/weekend-sports-activities-family-command-center/

    Final Thoughts

    Being prepared doesn’t mean planning for every possible situation.

    It means having a few reliable systems that make everyday life easier.

    Start with the items your family actually needs, keep them organized, and take a few minutes each week to replenish your supplies.

    Then, when the next sports weekend arrives, you can spend less time searching for forgotten things and more time enjoying the games.

    Be ready. Stay prepared. Enjoy the game.

    Command & Simplify — Practical Tools for a Simpler Life.

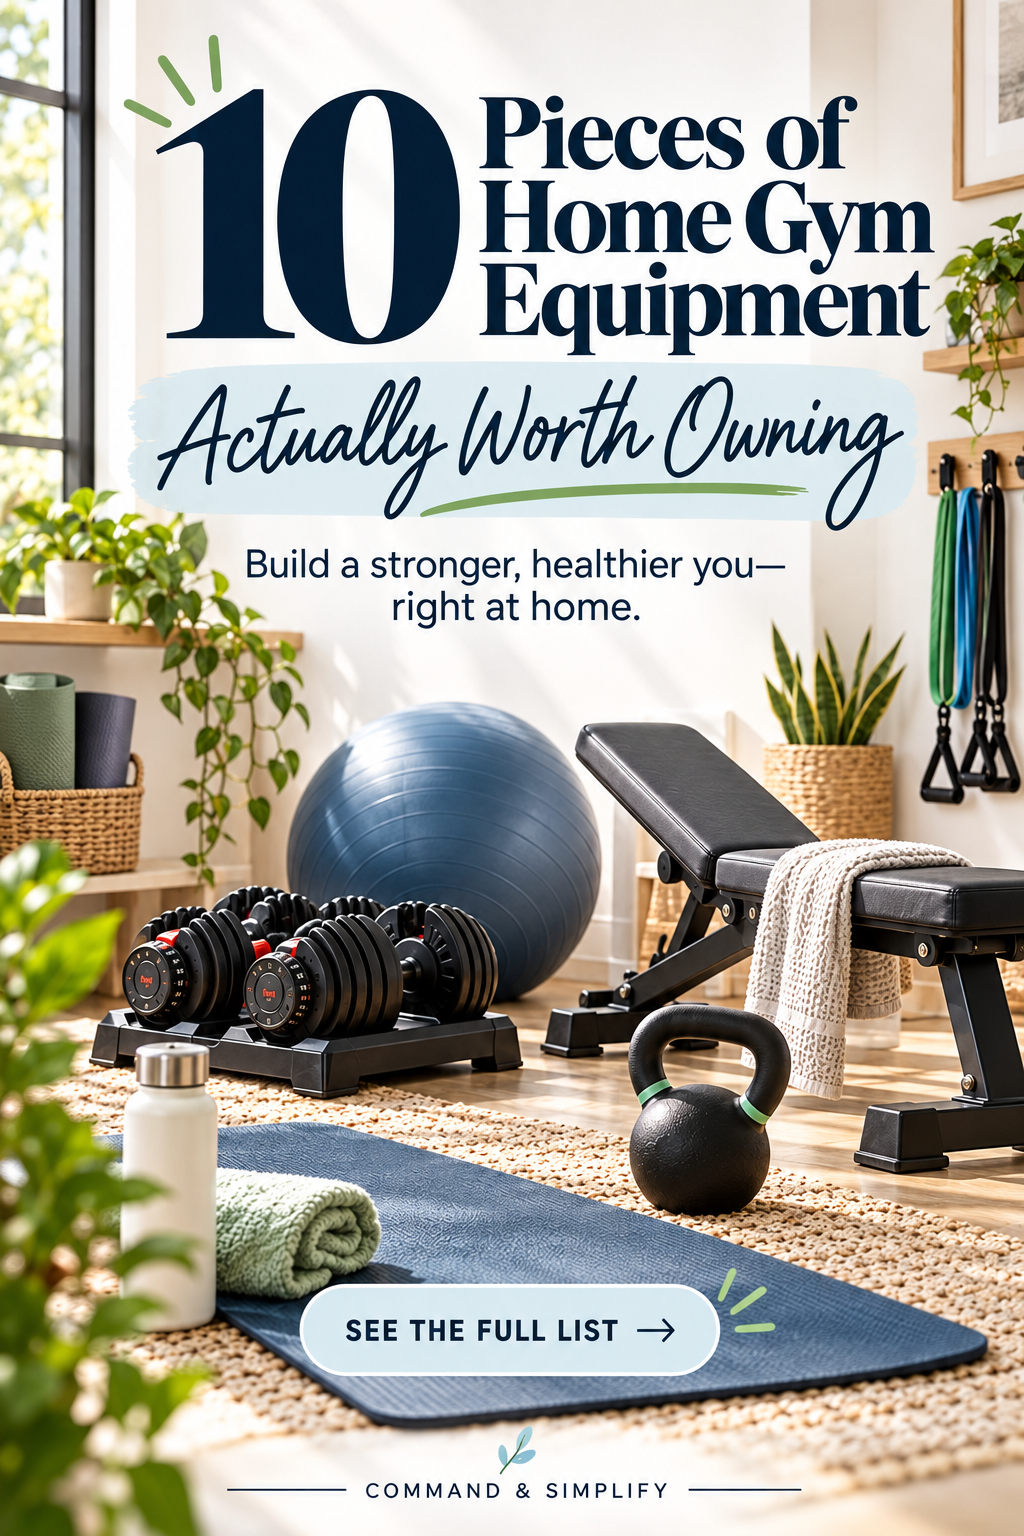
  • 10 Pieces of Home Gym Equipment Actually Worth Owning

    10 Pieces of Home Gym Equipment Actually Worth Owning

    Build a practical home gym without spending a fortune—or turning your spare bedroom into a fitness equipment warehouse.

    By Command & Simplify | Fitness & Wellness

    Let’s get something straight right away: you don’t need a garage full of expensive exercise equipment to get a good workout.

    You don’t need a dozen machines or a wall of mirrors. You need equipment you’ll actually use.

    A home gym can be a great investment—if you have the space and you’re actually going to use the equipment. Otherwise, it can quickly become the most expensive catch-all room in the house. Before you know it, the treadmill is holding laundry, the weight bench is covered in boxes, and your exercise bike has become a deluxe drying rack.

    The goal isn’t to fill a room with equipment. It’s to create a workout space you’ll actually use.

    I’ve spent plenty of time running, rowing, lifting weights, and doing bodyweight exercises. Over time, I’ve found that some of the simplest equipment can be the most useful.

    Dumbbells, kettlebells, a good exercise mat, and a rowing machine can provide a tremendous variety of workouts without requiring a commercial gym.

    I’ve also found ways to make basic exercises more challenging using a weighted vest.

    For this guide, we’re combining that firsthand workout experience with additional equipment recommendations for different fitness levels and budgets.

    These aren’t ten things everyone must buy. They’re ten pieces of equipment worth considering, with explanations of what each does, who might benefit, and where you can save money.

    Affiliate disclosure: This article contains affiliate links. Command & Simplify may earn a commission if you purchase through these links, at no additional cost to you. Recommendations are based on practical usefulness, personal experience where noted, and product research—not commission rates.

    1. Dumbbells: The Foundation of a Practical Home Gym

    If I could recommend only one piece of strength-training equipment, dumbbells would be near the top of my list.

    They’re versatile, easy to store, and useful for dozens of exercises.

    I regularly incorporate dumbbells into workouts, including curls, rows, shoulder presses, and exercises that combine several movements.

    One thing I’ve learned is that having more than one weight makes a big difference.

    My preferred home setup includes:

    • 8-pound dumbbells: Useful for lighter exercises and movements involving smaller muscle groups.
    • 15-pound dumbbells: A practical intermediate option for curls, presses, and other exercises.
    • 20-pound dumbbells: Helpful when additional resistance is appropriate.

    Those are personal preferences, not universal starting weights. Choose resistance based on your strength, technique, and the exercise.

    Our recommended product

    Power Systems Rubber Hex Dumbbells

    These fixed-weight dumbbells come in multiple weight options. The hexagonal design also helps keep them from rolling around the floor.

    View Rubber Hex Dumbbells at Power Systems

    My advice: Start with the weights you’ll use most often. You can add heavier pairs as you get stronger.

    There’s no prize for owning a 50-pound dumbbell you can’t safely lift.

    2. Adjustable Dumbbells: The Space-Saving Alternative

    Fixed-weight dumbbells are great, but there’s one obvious disadvantage.

    The more pairs you buy, the more floor space they occupy.

    Adjustable dumbbells solve that problem by combining several weight options into one compact system.

    They’re especially useful for people who want a variety of weights without purchasing and storing a large collection.

    Our recommended product

    Power Systems Adjustable Dumbbell Set

    This is a premium alternative worth considering for people who value versatility and limited storage space.

    View Adjustable Dumbbell Set at Power Systems

    When we reviewed the product, the listed options ranged from approximately $349.99 to $529.99, depending on configuration. Confirm the current price and weight range before purchasing.

    My advice: You don’t need both fixed-weight dumbbells and an adjustable set. Pick the approach that makes the most sense for your budget, training needs, and available space.

    3. Kettlebells: One Weight, Plenty of Exercises

    Kettlebells are another piece of equipment I personally enjoy using.

    They can add variety to traditional strength training, and their handle design makes them useful for exercises such as carries, squats, deadlifts, and certain swinging movements.

    A kettlebell doesn’t replace every dumbbell exercise, but it offers different movement possibilities.

    And you don’t need a whole collection to get started.

    Our recommended product

    Power Systems Kettlebell Prime

    We compared the Elite Kettlebell and Kettlebell Prime before choosing this option.

    The Prime offered a better price for the 15-pound version when we checked:

    • 10-pound option: $43
    • 15-pound option: $52

    Several other weights were also available. Check the current price and stock for your chosen size.

    View Kettlebell Prime at Power Systems

    My advice: Begin with controlled exercises and learn proper technique before attempting heavy or fast kettlebell swings.

    4. An Exercise Mat: Simple, Affordable, and Surprisingly Useful

    An exercise mat might not be the most exciting fitness purchase you’ll make, but it’s one of the most practical.

    I use a mat for floor exercises, including planks, core workouts, and other bodyweight movements.

    A decent mat creates a defined workout space and makes certain floor exercises more comfortable.

    It’s also easy to put away when you’re finished.

    Our recommended product

    Power Systems Premium Yoga Sticky Mat

    We selected the navy, quarter-inch-thick version.

    When checked, it was in stock for $24.50.

    The thickness offers cushioning for many common floor exercises while remaining easy to store.

    View Premium Yoga Sticky Mats at Power Systems

    My advice: For people who spend a lot of time kneeling or performing floor exercises, mat thickness matters. Choose enough cushioning for your comfort without sacrificing stability.

    5. A Stability Ball: A Useful Optional Core-Training Tool

    Stability balls aren’t essential for everyone, but they can add variety to core workouts, balance exercises, and controlled strength-training movements.

    The unstable surface changes the demands of certain exercises, requiring additional attention to balance and body position.

    They’re also relatively inexpensive compared with many other fitness products.

    This is an equipment recommendation based on its potential uses, not a product I’ve personally tested.

    Our recommended product

    Power Systems VersaBall Stability Ball

    We found two available sizes:

    • 55 cm — $28
    • 65 cm — $33

    Both were in stock when checked.

    View VersaBall Stability Ball at Power Systems

    My advice: Choose a ball that fits your height and intended exercises, and follow the manufacturer’s inflation and safety guidelines.

    If you’re already happy with your core routine, this is an optional purchase—not something you need to rush out and buy.

    6. A Jump Rope: Cardio Without Taking Up a Room

    Some fitness equipment costs hundreds of dollars and requires a dedicated space.

    A jump rope costs a few dollars and fits in a drawer.

    That’s a pretty good deal.

    Jumping rope can provide a challenging cardiovascular workout while also developing coordination and rhythm.

    It’s a useful option for people who want short, active sessions without a large machine.

    Of course, jumping isn’t appropriate for everyone. Anyone dealing with foot, ankle, Achilles, or knee problems may be better served by lower-impact activities.

    Our recommended product

    Power Systems Speed Rope

    When we researched it, the rope was offered in three sizes, priced from $5 to $6, with all three in stock.

    View Speed Rope at Power Systems

    My advice: Get the proper rope length, start with brief sessions, and build up gradually.

    You don’t have to jump for twenty minutes straight to benefit from using one.

    7. A Foam Roller: An Optional Recovery Accessory

    Foam rollers are popular for self-massage, mobility routines, and temporarily reducing feelings of muscle tightness.

    They’re not magic, and they aren’t a substitute for sleep, recovery time, or sensible training.

    But some people find them helpful.

    I don’t personally use a foam roller as part of my regular workout routine, so I’m not going to pretend it’s something I can’t live without.

    This is one of the optional items on our list.

    Our recommended product

    Power Systems High Density Foam Roller

    We found three in-stock options:

    • Standard size — $14.95
    • 18-inch — $19.95
    • 36-inch — $39.95

    View High Density Foam Roller at Power Systems

    My advice: Start gently, avoid rolling directly over painful joints or injured tissue, and treat foam rolling as an optional addition to your recovery routine.

    8. A Weighted Vest: Make Familiar Exercises More Challenging

    One piece of equipment I personally use is an 8-pound Athletic Works weighted vest.

    Mine is the older black neoprene model with padded shoulder straps and adjustable buckles.

    I use it for several activities:

    • Walking
    • Squats
    • Push-ups
    • Planks
    • Occasionally running

    What I like about a weighted vest is that it adds resistance without requiring me to hold weights in my hands.

    Bodyweight exercises that have become familiar can feel more challenging with a little additional load.

    But here’s an important distinction: A weighted vest is not necessary for beginners.

    Added weight increases the demands on your muscles, joints, and connective tissues. Running with a vest deserves particular caution because it increases loading with every step.

    Our recommended product

    Athletic Works 8 lb Weighted Vest

    This is the model I personally use. However, availability has been limited, and we haven’t confirmed an eligible Walmart affiliate link.

    Product link to be added when availability and affiliate eligibility are verified.

    My advice: Get comfortable with the unweighted exercise first. Start with short, controlled sessions, and increase resistance cautiously.

    For someone already comfortable performing push-ups, squats, and planks, a modestly weighted vest may provide useful variety.

    9. A Rowing Machine: My Favorite Cardio Investment

    This is one of the bigger purchases on the list, but it’s also one of my personal favorites.

    I own a MERACH rowing machine, purchased through Walmart, and I really enjoy using it.

    Rowing has become a regular part of my fitness routine.

    I use it alongside running, strength training, and other activities.

    What I appreciate about rowing is that it provides a workout involving both the upper and lower body while offering a lower-impact alternative to running.

    You can adjust the intensity for an easier session or push yourself for a more demanding cardiovascular workout.

    And unlike a treadmill, a rowing machine gives your arms something to do besides wondering how much longer you’re going to be on the treadmill.

    My personal recommendation

    MERACH Rowing Machine

    This is the brand I personally own and use.

    We still need to verify the exact model and its current availability at Walmart before recommending a specific listing.

    Product link to be added after model verification and, if approved, Walmart affiliate eligibility confirmation.

    My advice: A rowing machine isn’t the first piece of equipment everyone needs to purchase. But if you enjoy rowing and want an indoor cardio option, it’s worth considering.

    Before purchasing, pay attention to the machine’s footprint, resistance system, comfort, weight capacity, and storage requirements.

    10. Resistance Bands: Affordable Strength Training Almost Anywhere

    Resistance bands might be the simplest way to add exercise variety without taking up much space.

    They’re portable, inexpensive, and useful for many types of resistance training.

    You can use them for controlled upper-body exercises, lower-body movements, and certain warm-up routines.

    Different band strengths also make it easier to adjust resistance.

    Although dumbbells and kettlebells are my personal strength-training staples, bands are worth considering because they’re so convenient.

    Our recommended product

    Power Systems Fabric Resistance Bands

    When we researched this product, the three-band kit was listed for $20.

    View Fabric Resistance Bands at Power Systems

    My advice: Inspect resistance bands for wear before using them, and choose resistance levels you can control through the intended movement.

    They’re particularly useful for people who need equipment that’s easy to pack or store.


    What Home Gym Equipment Can You Skip?

    Let’s talk about the stuff you probably don’t need right away.

    When you’re building a home gym, it’s easy to get distracted by machines that promise incredible results.

    But buying more equipment doesn’t automatically mean getting better workouts.

    Before spending money, ask yourself three questions:

    Will I actually use it?

    A simple pair of dumbbells used three times a week is more valuable than an expensive machine collecting dust.

    Does it provide something my existing equipment doesn’t?

    If you already have dumbbells and a kettlebell, you may not need another piece of equipment that performs essentially the same exercises.

    Do I have space to store it?

    A home gym should make your life easier, not force you to climb over equipment to reach the washing machine.

    For most beginners, I’d postpone expensive multi-station machines, oversized weight racks, specialty exercise gadgets, and equipment that serves only one narrow purpose.

    How I’d Build a Home Gym on a Budget

    If I were starting from scratch, I wouldn’t purchase all ten items at once.

    I’d start small.

    First purchases: A pair of appropriately weighted dumbbells, an exercise mat, and perhaps resistance bands.

    Next additions: A kettlebell or a jump rope, depending on whether strength or cardio is the bigger priority.

    Later upgrades: Equipment such as a rowing machine, adjustable dumbbells, or a weighted vest—only when it fits your routine and budget.

    A stability ball or foam roller can be useful additions, but neither is mandatory.

    The goal isn’t to own ten products.

    The goal is to have the right tools for workouts you’ll actually do.

    My Final Takeaway

    After years of exercising in different ways, I’ve come to appreciate simple, practical equipment.

    Dumbbells are versatile. Kettlebells add variety. An exercise mat makes floor workouts more comfortable. My MERACH rower provides an indoor cardio option I genuinely enjoy.

    And an 8-pound weighted vest lets me add a little resistance to exercises I already do.

    But none of these tools does the work for you.

    The most useful home gym isn’t necessarily the most expensive.

    It’s the one you actually use.

    Start with what fits your goals, add equipment when you need it, and don’t feel pressured to fill every corner of your house with fitness gear.

    That’s a simpler—and often more affordable—way to build a home gym that works.


    More from Command & Simplify

    If you’re working on improving your fitness, you may also enjoy:

    Command & Simplify — Practical Tools for a Simpler Life.

    Editorial note: Prices and availability were checked during product selection in October 2026 and can change. Product-specific firsthand experience is distinguished from researched recommendations. Affiliate links should be tested for tracking and current availability before publication.

  • Post-Run Recovery After 50: What Actually Helps (and What Doesn’t)

    Post-Run Recovery After 50: What Actually Helps (and What Doesn’t)

    You finished the run. Now what? Here's what I've learned about sore muscles, heavy legs, exhaustion, and getting ready to run again.

    When I started running at 49, I was focused on one thing.

    Running.

    Could I finish a mile? Could I make it three miles? Could I complete a 5K?

    Eventually, those goals became bigger.

    Now I'm 51, and I've completed an 11-mile run.

    And somewhere along the way, I discovered something I hadn't given nearly enough thought to when I first started.

    Finishing the run is only half the battle.

    Because what happens afterward matters, too.

    As my distances have increased, I've learned that recovery isn't necessarily about expensive equipment, complicated supplements, or an elaborate routine.

    Sometimes the simplest things matter most.

    And sometimes, the best thing you can do is give yourself a little time.

    Why My 11-Mile Run Was Different

    By the time I attempted 11 miles, I'd already completed runs of six, seven, eight, and nine miles.

    And here's something important.

    Those earlier runs hadn't left me feeling completely exhausted.

    So when I went out for 11 miles, I had some confidence in what I could accomplish.

    But this run was different.

    My legs felt heavy. My energy was low. I walked several times, and by the time I finished, I was completely drained.

    I completed those 11 miles in 2 hours, 5 minutes, and 37 seconds.

    I was happy I'd finished.

    But afterward?

    I wasn't thinking about another run.

    I was thinking about sitting down.

    What Actually Helped Me

    Here's the interesting part.

    There wasn't some special recovery product that suddenly made everything better.

    I needed time.

    I needed to let a little time pass and give my body a chance to settle down.

    Eventually, I took a bath.

    That felt good.

    Then I ate, and that helped too.

    Nothing complicated. Nothing expensive.

    Time, a relaxing bath, and some food.

    By the following morning, my energy felt normal again.

    My legs were still a little sore, and I could feel some of that soreness two days after the run.

    But otherwise, I felt fine.

    That experience reminded me of something important.

    Just because you've handled one distance comfortably doesn't mean a longer distance will affect you the same way.

    Going from nine miles to eleven might not sound like an enormous jump.

    But it's more than a 20% increase in distance.

    And for me, those extra miles made a noticeable difference.

    Was it the added distance? My fueling? My energy level going into the run?

    Maybe some combination of those things.

    I don't know for certain.

    What I do know is that I need to respect the demands of longer runs and give myself time to recover afterward.

    That doesn't mean everyone should delay food or fluids after a demanding run, particularly if they're feeling unwell. Appropriate hydration and nutrition matter, and unusual or persistent exhaustion deserves medical attention.

    Some Days You Have It. Some Days You Don't.

    Here's something I've noticed since I started running.

    Some days I feel fantastic.

    My legs feel good, I've got energy, and running feels almost effortless.

    Other days?

    Not so much.

    And sometimes there's absolutely no rhyme or reason to it.

    Maybe it's part of being 51.

    I suppose it could be.

    It's the first time I've been this age, so I'm still figuring it out.

    But I've learned not to judge my fitness based on one difficult run.

    I've completed runs of six, seven, eight, and nine miles without feeling completely exhausted.

    Then I went out and completed eleven miles, and that particular run absolutely drained me.

    By the next morning, my energy was back to normal. My legs were still a little sore, even two days later, but otherwise I felt fine.

    Was it the extra mileage? My fueling? Something else?

    Maybe some combination of everything.

    I don't know.

    And I'm learning that I don't always need to have an answer.

    What matters is paying attention to how I feel, adjusting when necessary, and not forcing every run to be a great one.

    One bad run doesn't erase all the good ones that came before it.

    And one great run doesn't mean you're ready to conquer the world tomorrow.

    Some days you've got it.

    Some days you don't.

    The goal is to keep showing up, train intelligently, and recognize when your body needs an easier day.

    1. Start Recovering as Soon as You Finish

    When I finish a long run, my natural inclination is sometimes to stop moving immediately.

    Especially when I'm exhausted.

    But going straight from a hard effort to sitting perfectly still isn't always the most comfortable transition.

    A short, easy walk gives your breathing and heart rate a chance to settle gradually.

    You don't need to walk another two miles.

    Just move around gently for a few minutes if you feel well enough.

    Then change out of sweaty clothes, get comfortable, and begin replenishing what you've used.

    My takeaway: Don't make recovery an afterthought that begins three hours later.

    One important exception: if you're unusually dizzy, faint, confused, or otherwise unwell, don't try to walk it off. Stop, get somewhere safe, and seek medical help when appropriate.

    2. Eat Something That Actually Helps You Recover

    This is one area I think newer runners can overlook.

    You just spent an hour or two exercising.

    Your body has used energy, and your muscles need nutrients to repair and adapt.

    After a longer run, a meal or snack containing carbohydrates and protein makes sense.

    Carbohydrates help replenish the energy stored in your muscles.

    Protein supports muscle repair.

    It doesn't have to be a special recovery shake.

    Some straightforward options include:

    • Eggs and toast with fruit

    • Greek yogurt with oatmeal or a banana

    • Chicken, rice, and vegetables

    • A turkey sandwich and fruit

    • A smoothie with protein and carbohydrates

    • Leftovers from a normal, balanced meal

    Personally, I prefer practical food over buying a collection of products that promise miraculous recovery.

    For people exercising again soon, timing can be especially important. But if your next challenging run isn't until another day, eating a balanced meal within a reasonable period is generally more important than hitting an exact minute on the clock.

    My takeaway: Don't spend a fortune on recovery products while overlooking a decent meal.

    3. Rehydrate—but Don't Just Keep Chugging Water

    During longer runs, I carry water with a hydration packet mixed into it.

    It's part of my preparation.

    But hydration doesn't stop at the finish line.

    After running, especially in warm weather, you've likely lost fluid through sweat.

    You need to replace that fluid appropriately.

    For many runs, regular water and normal meals are enough.

    After longer or particularly sweaty efforts, replacing some sodium through food or an appropriate electrolyte drink may also be useful.

    The amount varies by person, weather, and how much you sweat.

    The goal isn't to drink as much water as physically possible. Drinking excessive amounts can be dangerous.

    Pay attention to thirst, how you're feeling, and your conditions.

    And remember that hydration packets aren't all the same. Some contain meaningful electrolytes; others are primarily flavoring.

    My takeaway: Have a hydration plan, but don't assume more is always better.

    4. Heavy Legs Don't Automatically Mean Something Is Wrong

    One of the things I've noticed as my mileage has increased is how heavy my legs can feel after a difficult run.

    I'm not necessarily talking about sharp pain.

    I'm talking about that tired, worn-out feeling when your legs have done a lot of work.

    After longer runs, I can also have general muscle soreness the next morning.

    Fortunately, that soreness has often improved as the day goes on.

    There's a name for soreness that develops after unfamiliar or demanding exercise: delayed-onset muscle soreness, often shortened to DOMS.

    It commonly becomes noticeable hours after a workout and may peak a day or two later.

    That doesn't mean every ache is ordinary muscle soreness.

    A sharp, localized, worsening, or recurring pain—especially one that changes how you walk or run—deserves more attention.

    I've had muscle strains and discomfort around the back of my heel before, so I know it's important not to explain away every warning sign as normal recovery.

    My takeaway: Learn the difference between general tired muscles and pain that may represent an injury.

    5. Sometimes Light Movement Feels Better Than Doing Nothing

    When my legs are generally sore, sitting around all day doesn't always make them feel better.

    Sometimes getting up, walking, and moving around gently helps loosen things up.

    That doesn't mean going out for another hard run.

    It might mean:

    • Taking an easy walk

    • Doing some gentle mobility work

    • Riding a stationary bike at a very easy pace

    • Moving around the house instead of staying in one position all afternoon

    Light movement can temporarily reduce stiffness and make sore muscles feel more comfortable.

    But there's a difference between easy movement and adding another demanding workout before your body is ready.

    And if you're exhausted, ill, or dealing with a possible injury, genuine rest may be the better choice.

    My takeaway: Recovery doesn't always mean sitting completely still—but it shouldn't become another workout you have to survive.

    6. Stretching Helps Me Feel Better, but It Isn't Magic

    I'm a believer in taking care of my legs.

    I've strained muscles before, particularly around my calves, and that has made me more conscious of warming up before running and cooling down afterward.

    I pay attention to my hamstrings, quadriceps, and calves.

    After a run, I like gentle stretching.

    For me, it can feel good when my muscles are tight.

    But there's an important distinction.

    Stretching may help you feel less stiff, but it isn't a guaranteed way to prevent next-day soreness or running injuries.

    I wouldn't recommend forcing a deep stretch into a painful muscle.

    And I'm particularly cautious about aggressive calf stretches when there's discomfort near the Achilles tendon or heel.

    If a stretch hurts, back off.

    If a problem keeps returning, get it checked rather than stretching harder and hoping for the best.

    My takeaway: Stretch for comfort and mobility, not because you believe it's a cure for everything.

    7. Epsom Salt Baths: I Like Them, but Let's Be Realistic

    Here's one of my personal favorites.

    After a difficult run, I enjoy an Epsom salt bath.

    There's something about getting into warm water when your legs are tired that feels good to me.

    I find it relaxing, and it's part of the recovery routine I enjoy.

    But does the Epsom salt itself actually speed muscle recovery?

    That's much harder to establish.

    Although Epsom salt contains magnesium sulfate, good evidence that soaking in it supplies meaningful magnesium through your skin or accelerates muscle healing is lacking.

    The warm water and relaxation may explain much of the benefit people experience.

    And that's okay.

    Not everything you do after a run needs to create a measurable athletic advantage.

    Sometimes feeling comfortable and relaxed is enough.

    Just avoid excessively hot water, especially if you're overheated or lightheaded after running.

    My takeaway: Enjoy a warm bath if it helps you feel better. Just don't mistake comfort for a scientifically proven recovery shortcut.

    8. Sleep Might Be the Most Underrated Recovery Tool

    I can buy better shoes.

    I can experiment with hydration mixes.

    I can stretch, walk, and take a warm bath.

    But none of that replaces adequate sleep.

    Your body needs rest to recover and adapt to the work you've done.

    For adults over 50, that's worth taking seriously—especially when combining running with work, family obligations, and everyday responsibilities.

    Most adults should aim for at least seven hours of sleep regularly, and some people need more.

    After a demanding run, I don't think it makes sense to sacrifice sleep just to squeeze in another workout.

    My takeaway: Before spending money on recovery gadgets, make sure you're giving yourself enough time to sleep.

    9. The Next Run Doesn't Have to Be Another Big Run

    This one is especially important to me.

    I like challenging myself.

    If you've read my first long-run article, you know I believe in doing difficult things rather than automatically choosing the easiest path.

    But there's something I'm learning as I build toward longer distances.

    You don't have to prove how tough you are every single day.

    After a demanding long run, I don't need to go out the next morning and try to beat that distance.

    My muscles, tendons, and energy levels need time to recover.

    Some days the right decision is an easy run.

    Some days it's walking or another light activity.

    And some days it's taking a genuine day off.

    Recovery needs vary. There's no universal rule saying every runner over 50 must rest exactly two or three days after every long run.

    What matters is how demanding the workout was, what you're accustomed to, whether symptoms are improving, and whether you're ready for the next session.

    My takeaway: Consistency over months matters more than squeezing one more hard workout into a week.

    10. Know When Exhaustion Is More Than Normal Fatigue

    I want to make an important point here.

    After my 11-mile run, I was extremely exhausted.

    I also experienced some stomach discomfort early in the run, although that eventually passed.

    I've learned that nutrition, preparation, pacing, and recovery all affect how I feel.

    But I don't want someone reading this article to conclude that feeling completely wrecked after every run is the goal.

    It isn't.

    And there are symptoms you shouldn't simply classify as being tired.

    Stop exercising and seek urgent medical assessment for symptoms such as chest pain, fainting, severe shortness of breath, confusion, or severe weakness. Persistent dizziness, unusual nausea, dehydration symptoms, or other symptoms that are out of proportion to the workout also deserve prompt medical attention.

    Severe muscle pain or swelling accompanied by unusually dark urine can be a warning sign of a serious condition and requires urgent medical evaluation.

    The goal of running is to become stronger and healthier.

    Not to see how much punishment your body can tolerate.

    My takeaway: Mental toughness matters. Knowing when to stop matters, too.

    11. What You Probably Don't Need to Buy

    Running has an entire marketplace devoted to recovery.

    Foam rollers.

    Massage guns.

    Compression boots.

    Recovery drinks.

    Specialized supplements.

    Ice baths.

    And equipment that costs more than some people's monthly grocery bills.

    Some of these tools can help people feel more comfortable, and certain approaches have modest evidence for reducing soreness.

    A basic foam roller, for example, may provide temporary relief for some runners.

    But none of these products should replace the fundamentals.

    Start with:

    • Enough food

    • Appropriate hydration

    • Sufficient sleep

    • Easy movement when helpful

    • Rest between demanding workouts

    • A training plan that matches your current ability

    If you later find a tool that genuinely makes your routine easier, great.

    But don't feel as though you need to purchase a complete recovery system just because you've started running farther.

    My takeaway: Do the simple things consistently before shopping for complicated solutions.

    My Simple Post-Run Recovery Checklist

    Right After the Run

    ☐ Slow down and cool off gradually.

    ☐ Walk gently for a few minutes if you're feeling well.

    ☐ Begin replacing fluids as needed.

    ☐ Eat a meal or snack with carbohydrates and protein.

    ☐ Change into comfortable, dry clothes.

    Later That Day

    ☐ Keep drinking fluids normally.

    ☐ Eat balanced meals.

    ☐ Move gently if it helps with stiffness.

    ☐ Stretch lightly if comfortable.

    ☐ Enjoy a warm bath if you like one.

    ☐ Make sleep a priority.

    Before Your Next Run

    ☐ Check how your legs and energy levels feel.

    ☐ Notice any recurring or localized pain.

    ☐ Consider whether you need another easy or rest day.

    ☐ Avoid turning every run into a personal-record attempt.

    ☐ Adjust your training if your recovery isn't keeping up.

    The Most Important Lesson I've Learned About Recovery

    I didn't start running at 49 because I thought it would be easy.

    I wanted to challenge myself.

    I wanted to see what I could accomplish.

    And I wanted my children to see that you can start something difficult later in life and make progress through effort and consistency.

    At 51, finishing 11 miles means something to me.

    But I've also learned that determination doesn't mean doing everything the hard way.

    Sometimes the smart decision is to rest.

    Sometimes it's to eat, hydrate, and get a good night's sleep.

    Sometimes it's recognizing that your body isn't ready for the next challenge just yet.

    I still want to push myself.

    I still want to see how far I can go.

    But I also want to recover well enough to keep running next week, next month, and years from now.

    That's the real goal.

    Not just finishing one difficult run.

    Building a healthier, stronger life that lets you keep doing difficult things.

    Keep Building Your Running Foundation

    If you're getting started, read Your First 5K: What You Actually Need (and What You Don’t).

    Ready to run farther? Read What to Bring on Your First Long Run: The Essentials for 6–10 Miles, including our free printable checklist.

    Command & Simplify — Practical Tools for a Simpler Life

    This article shares personal experience and general educational information, not individualized medical advice. Consult a qualified healthcare professional about persistent pain, unusual symptoms, or health concerns related to exercise.
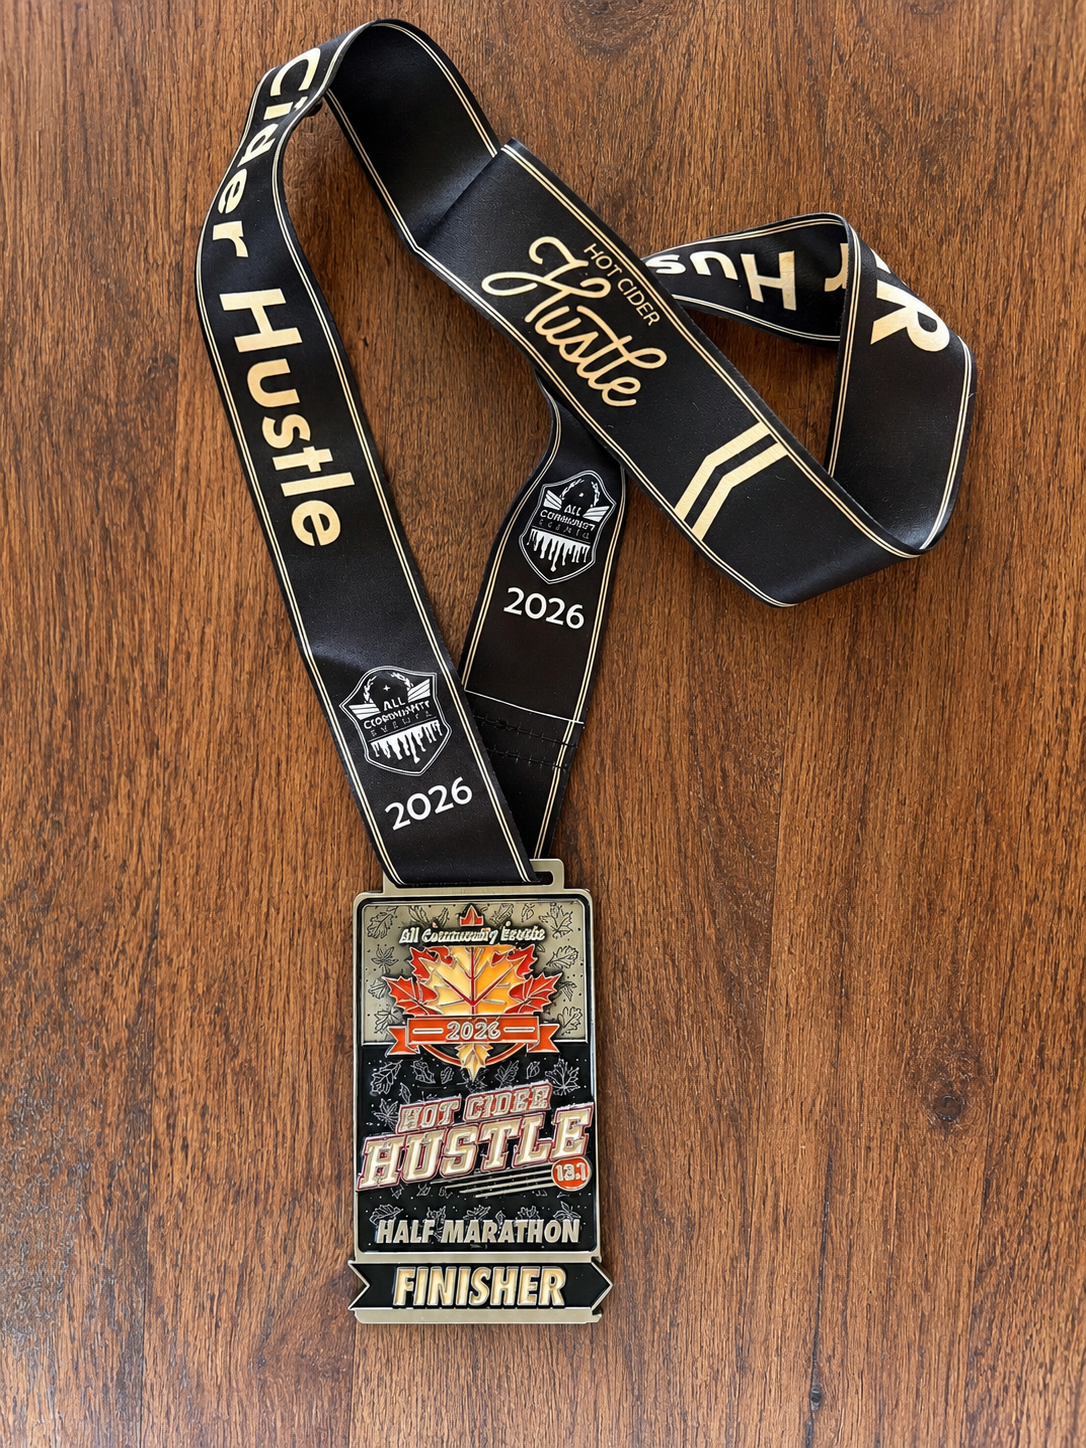
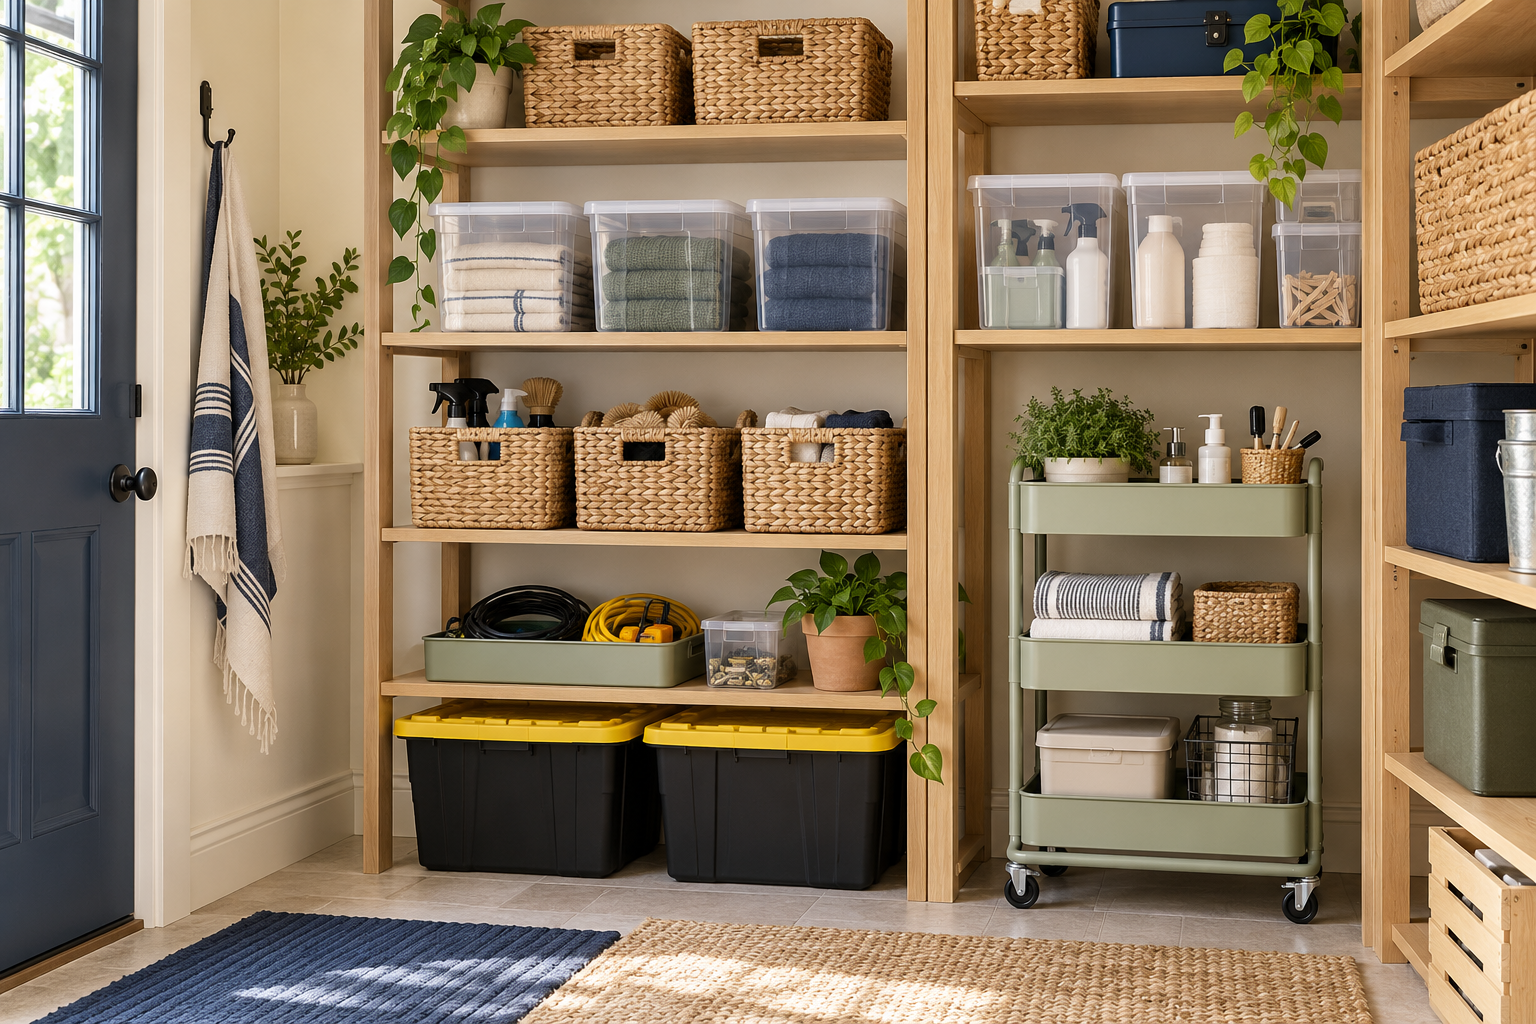
  • What to Bring on Your First Long Run: The Essentials for 6–10 Miles

    What to Bring on Your First Long Run: The Essentials for 6–10 Miles

    Running farther doesn't require a fortune in equipment. But a little preparation can make a big difference.

    There's a big difference between heading out for a three-mile run and deciding you're going to tackle six, eight, or even ten miles.

    I started running at 49. Now, at 51, I've completed an 11-mile run.

    And one of the biggest surprises wasn't necessarily how I felt during the run.

    It was how wiped out I felt afterward.

    After some of my longer runs, I was completely exhausted. My legs felt heavy. Sometimes I'd still have a little soreness the following morning, although it usually improved as the day went on.

    My 11-mile run wasn't exactly a highlight reel. I walked quite a few times, my energy was low, and I wasn't feeling particularly great.

    But I finished.

    And finishing a difficult distance taught me that a long run involves more than simply putting one foot in front of the other.

    Your preparation matters. Your equipment matters. Your recovery matters.

    And sometimes, the biggest challenge is what happens between your ears.

    Here's what I've learned about preparing for longer distances, without turning running into an expensive shopping project.

    1. Good Running Shoes Are Worth Prioritizing

    If there's one piece of equipment I'd encourage new distance runners to take seriously, it's their shoes.

    Not just athletic shoes.

    Actual running shoes.

    When I started running longer distances, I noticed the difference. Proper running shoes felt better and more comfortable for the job I was asking them to do.

    That doesn't mean you need the most expensive pair in the store.

    Look for shoes that:

    • Fit comfortably without pinching or rubbing
    • Leave enough room for your toes
    • Hold your heel securely
    • Feel good during shorter training runs
    • Don't create new areas of pain

    And don't make your longest run the first time you test a brand-new pair.

    A good fit matters more than a flashy price tag.

    2. Wear Comfortable Clothes You've Already Tested

    For a short run, a shirt that rubs a little might not seem like a big deal.

    After eight miles, you may feel very differently about that shirt.

    Choose clothing that moves comfortably, handles sweat reasonably well, and suits the weather.

    I recommend checking:

    • Your shirt and shorts or running pants
    • Socks that don't bunch or create hot spots
    • Layers for cooler weather
    • A hat, sunglasses, or sunscreen when appropriate

    Don't overdress just because the first few minutes feel chilly.

    And if you're buying clothing specifically for longer runs, comfort should come before appearance.

    3. Warm Up Before Running—and Make Time to Stretch Afterward

    This is something I take seriously.

    I've strained my calves and other leg muscles before, and I've also experienced heel discomfort around the Achilles tendon attachment.

    Those experiences made me much more aware of how important preparation and recovery are.

    Before running, I recommend starting with several minutes of easy movement and a dynamic warm-up.

    That might include walking, gentle jogging, leg swings, marching, or controlled movements that prepare your legs for running.

    I pay particular attention to my hamstrings, quadriceps, and calves.

    After running, I like to cool down and stretch gently.

    One distinction matters: warming up and stretching aren't exactly the same thing. Long, forceful static stretches aren't necessary immediately before a run, and stretching doesn't guarantee you'll avoid soreness or injury.

    If you have recurring Achilles or heel discomfort, don't force painful calf stretches. Persistent symptoms deserve assessment from a qualified professional.

    For me, taking a few minutes before and after a run is a worthwhile part of the routine.

    4. Carry Water and Have a Hydration Plan

    When I run longer distances, I carry a water bottle with a hydration packet mixed into it.

    It's a simple setup that works for me.

    You don't necessarily need an expensive hydration vest to run six miles.

    But as distances increase, particularly in warmer weather, you should think about where you'll get fluids.

    Options include a handheld bottle, a running belt, or a route with reliable water stops.

    How much you need depends on the weather, duration, effort, and your individual sweat rate.

    Some hydration packets contain substantial sodium; others contain very little. Check the label so you know what you're drinking.

    And don't force excessive amounts of water. Overhydration can also be dangerous.

    The important thing is to have a plan before you leave home.

    5. Think About Fuel Before You're Completely Drained

    As my running distances increased, I started experimenting with fuel during the run.

    I've used Honey Stinger energy chews, taking three approximately every 30 minutes on some of my longer outings.

    They've generally agreed with my stomach, which matters when you're moving for a couple of hours.

    But I've also learned that what you eat before running makes a difference.

    Before one of my longest runs, I ate a substantial meal fairly close to my start time and experienced stomach cramps early in the run.

    The cramps eventually passed, but it wasn't exactly the beginning I wanted.

    For most adequately fueled runs around an hour or less, you may not need carbohydrates during the run.

    For longer efforts, especially beyond roughly 75–90 minutes, portable carbohydrates may help maintain energy. Endurance guidance commonly uses around 30–60 grams of carbohydrate per hour for sustained exercise, depending on duration and tolerance.

    Check the nutrition label on your chews or gels instead of assuming a certain number of pieces delivers enough fuel.

    Most importantly, practice before race day. Everybody's stomach is different.

    6. Plan Your Route So You Finish Near Home

    Here's one of my simplest tips:

    Make sure your planned final miles bring you close to home.

    After a long run, the last thing I want is to finish several miles away and realize I still need to get back.

    Before heading out, I plan my mileage, turning points, and where I expect to finish.

    An out-and-back route or a series of loops can make that easier.

    I also recommend bringing your phone, checking the weather, and letting someone know your general plan.

    Even if you prefer running without music or distractions, your phone is worth carrying for emergencies.

    And remember, your plan should have some flexibility. If you need to shorten a run because of pain, illness, unsafe conditions, or unusual fatigue, that's a sensible decision—not a failure.

    7. Build Your Distance Gradually

    Just because you can finish a long distance doesn't necessarily mean your body is ready to repeat it every few days.

    I've learned that lesson while dealing with muscle soreness and occasional discomfort around my heel.

    Your muscles, tendons, and other tissues need time to adapt.

    Increase your training gradually. Give yourself easier days. Don't treat every run like an opportunity to set a personal record.

    There's no single mileage-increase rule that works for everyone.

    What matters is building consistently without letting ambition outrun recovery.

    And if discomfort keeps returning in the same place, even if it sometimes fades after warming up, don't automatically assume it's harmless.

    8. The Voice That Wants You to Take the Easy Way Out

    This might be the biggest reason I keep running.

    Some people like music, podcasts, or audiobooks while they run.

    I understand that completely.

    If listening to something makes a difficult run more enjoyable and helps you stay consistent, that's great.

    But I prefer no distractions.

    I want to hear my thoughts.

    Sometimes those thoughts aren't particularly encouraging.

    This sucks.

    This is hard.

    I still have eight miles to go.

    And that's part of why I'm out there.

    At this point in my life, I want to do difficult things.

    When I'm tired and my mind starts telling me to take the easy way out, I repeat a phrase to myself:

    I WILL NOT STOP.

    It's my way of fighting the temptation to quit simply because something is hard.

    That doesn't mean ignoring an injury. Severe pain, symptoms that worsen, dizziness, or anything that seriously concerns me is a reason to stop and assess what's happening. Even milder recurring pain deserves attention.

    But there's a difference between recognizing a genuine warning sign and giving up solely because the effort is uncomfortable.

    I want to get better at facing challenges instead of automatically choosing the easy path.

    And there's a reason that matters to me beyond running.

    My kids are watching.

    I want my children to see me attempt difficult things.

    I want them to understand that you don't have to be naturally gifted at something to improve.

    You can struggle. You can have setbacks. You can work toward a goal that once seemed impossible.

    I started running at 49.

    Now I'm 51, and I've completed 11 miles.

    It wasn't effortless. It wasn't pretty every step of the way.

    But it was something I worked toward.

    I hope my children remember that.

    Because one day their challenge might be basketball, school, work, or something much bigger than running.

    I want them to believe they can do difficult things, too.

    Sometimes the most valuable thing you bring home from a long run isn't a new distance record. It's the example you set.

    9. Recovery Starts Before the Run Is Over

    The soreness and exhaustion after longer runs surprised me.

    Sometimes I felt pretty wiped out immediately after finishing, with some soreness carrying into the next morning.

    I've learned to plan for that.

    After a longer run, I try to make time for:

    • Easy walking to cool down
    • Fluids and food to replenish what I've used
    • A meal or snack containing carbohydrates and protein
    • Dry, comfortable clothing
    • Gentle stretching if it feels helpful
    • Adequate rest before another demanding workout

    I also enjoy Epsom salt baths after a difficult run.

    For me, a warm soak feels relaxing. I wouldn't claim the salt itself is a proven cure for soreness, but it's something I find helpful.

    And I've learned that exhaustion is not a badge of honor I need to chase. Unusual weakness, dizziness, nausea, or symptoms that don't resolve normally call for taking recovery seriously and getting medical advice when appropriate.

    Doing hard things is important to me.

    So is being healthy enough to keep doing them.

    10. What You Don't Need to Buy

    Let's simplify this.

    For your first six-to-ten-mile run, you probably don't need the most expensive GPS watch, premium hydration vest, multiple supplements, specialized recovery gadgets, or the same equipment elite marathon runners use.

    Start with the essentials.

    Invest in comfortable running shoes.

    Dress appropriately.

    Have a hydration and fueling plan that matches your distance and conditions.

    Know your route.

    Then add equipment as you discover what actually makes your runs easier or safer.

    Don't let running become another expensive project before you've given yourself a chance to enjoy it.

    Your First Long-Run Checklist

    The Night Before

    ☐ Check the weather.

    ☐ Plan your distance and route.

    ☐ Make sure your route finishes near home.

    ☐ Set out tested running shoes and comfortable clothing.

    ☐ Prepare water and any hydration mix.

    ☐ Pack chews, gels, or other fuel if needed.

    ☐ Charge your phone.

    ☐ Plan what you'll eat before and after the run.

    Before You Leave

    ☐ Eat something your stomach tolerates.

    ☐ Drink fluids as needed.

    ☐ Use the bathroom.

    ☐ Check your route and expected finish point.

    ☐ Tell someone your general plan.

    ☐ Bring your phone and identification.

    ☐ Carry your planned water and fuel.

    ☐ Complete an easy dynamic warm-up.

    After the Run

    ☐ Walk for a few minutes to cool down.

    ☐ Rehydrate appropriately.

    ☐ Eat a recovery meal or snack.

    ☐ Change into dry clothes.

    ☐ Stretch gently if comfortable.

    ☐ Rest and monitor any unusual symptoms.

    ☐ Appreciate the work you just put in.

    The Goal Isn't Just to Finish. It's to Keep Growing.

    When I started running at 49, I didn't know how far I would eventually go.

    At 51, having completed an 11-mile run, I've learned that going farther isn't only about increasing distance.

    It's about preparation.

    It's about patience.

    It's about learning what your body needs.

    And sometimes it's about challenging that little voice that tells you to take the easy way out.

    You don't need to buy everything.

    You don't need to run every mile perfectly.

    You don't even need to love every minute of the experience.

    Start with a manageable challenge. Prepare properly. Build gradually.

    And when you finish something that once seemed beyond you, take a moment to recognize what you've accomplished.

    Because doing difficult things can change what you believe you're capable of.

    And sometimes, the people watching you learn that lesson, too.

    Keep Building Your Running Foundation

    If you're new to running and haven't worked up to longer distances yet, start with our guide:

    Your First 5K: What You Actually Need (and What You Don’t)

    Command & Simplify — Practical Tools for a Simpler Life

    This article shares personal experience and general educational information, not individualized medical advice. Stop exercising and seek appropriate medical care for concerning symptoms. Persistent or recurring pain should be evaluated by a qualified healthcare professional.