
Author: commandandsimplify

  • Your First 5K: What You Actually Need (and What You Don’t)

    Your First 5K: What You Actually Need (and What You Don’t)

    When I first decided to run a 5K, I didn’t go shopping for running gear.

    I didn’t buy expensive running shoes.

    I didn’t buy special running shorts.

    I didn’t buy headphones. In fact, I don’t listen to music or anything else while I run.

    I already had an Apple Watch, so I used that to keep track of how far I was running.

    For shoes?

    I wore the sneakers I already owned. I think they were just a pair of Adidas.

    And then I started running.

    That’s really the point of this article.

    If you’re thinking about running your first 5K, it’s easy to convince yourself that you need to get everything figured out before you start.

    You don’t.

    Start easy. Progress slowly. And use what you already have when you can.

    You Don’t Need to Run 3.1 Miles on Day One

    A 5K is 3.1 miles.

    That doesn’t mean your first run needs to be anywhere close to 3.1 miles.

    When I started, I went one mile.

    That was enough.

    Then I gradually increased the distance.

    I ran three times a week, and when things were going well, I generally added about a quarter mile each time out.

    One mile became 1.25.

    Then 1.5.

    Then 1.75.

    And so on.

    I wasn’t trying to prove anything on one particular run.

    I was trying to slowly build myself into somebody who could comfortably complete a 5K.

    Start Easier Than You Think You Need To

    If you’ve never really been a runner, there’s no reason your first run needs to destroy you.

    Go a mile.

    If a mile is too much right now, there’s nothing wrong with walking part of it.

    The important thing is that you start.

    Then see how you feel.

    You’re building something.

    You don’t need to build the whole thing today.

    Progress Slowly

    This was a big part of my approach.

    I didn’t go from one mile to three miles because one run felt good.

    I increased gradually.

    For me, that was usually about a quarter mile at a time.

    That doesn’t mean everybody needs to follow exactly the same progression.

    The point is:

    Don’t rush it.

    Your cardiovascular fitness may start improving before the rest of your body is ready for large increases in running.

    Give yourself time to adapt.

    If something hurts or doesn’t feel right, don’t assume you have to keep increasing the distance just because that’s what you planned.

    The plan can wait.

    Three Runs a Week Was Enough for Me

    When I was preparing for my first 5K, I ran three times per week.

    That gave me running days and recovery days.

    I didn’t feel like I needed to run every day to make progress.

    Consistency mattered more.

    Three manageable runs that I could recover from made more sense to me than trying to run constantly and turning the whole thing into something I dreaded.

    Once I Reached 3 Miles, I Stayed There for a While

    This is another thing I think beginners can overlook.

    You don’t always have to increase the distance.

    Once I got to around 3 miles, I maintained that distance for a while leading up to the 5K.

    I had essentially reached the distance I needed.

    There wasn’t any reason for me to keep turning every run into another mileage goal.

    Sometimes progress means adding distance.

    Sometimes progress means getting comfortable with the distance you’ve already reached.

    At First, I Focused on Distance—Speed Came Later

    When I first started running, I wasn’t particularly concerned about how fast I was going.

    My goal was distance.

    Could I run a mile?

    Then could I go a little farther?

    I kept gradually increasing the distance until I worked my way up to around three miles.

    Only later did I start paying more attention to my time.

    Once I could comfortably cover the distance, it became fun to see whether I could run that same distance a little faster.

    That’s another reason I wouldn’t tell a new runner to worry about pace right away.

    You don’t necessarily need to improve everything at once.

    First I built the distance. Later I worked on the time.

    For a beginner, simply finishing the run can be the goal.

    There will be plenty of time later to decide whether you want to get faster.

    You Probably Don’t Need Much Gear

    This is where running can become unnecessarily complicated.

    There are fantastic running shoes, watches, clothes, headphones, hydration products and other accessories available.

    Some of them can absolutely be useful.

    But you don’t necessarily need them to find out whether you enjoy running.

    When I started, I used what I already had.

    Regular sneakers.

    Regular workout clothes.

    My existing Apple Watch to measure distance.

    That’s about it.

    I didn’t even use headphones.

    You don’t need to shop your way into becoming a runner.

    Go run first.

    Shoes Are Worth Paying Attention To

    I do want to make an important distinction here.

    I started in ordinary Adidas sneakers because that’s what I had.

    As I continued running and eventually moved beyond the 5K toward training for a 10K, I decided to get better running shoes.

    I moved to Brooks, and later I switched to HOKA.

    As your mileage increases, footwear becomes something worth taking more seriously.

    But that doesn’t mean somebody who’s thinking about trying a one-mile run tomorrow needs to delay starting until they’ve researched 30 pairs of shoes.

    If the shoes you already own are comfortable and appropriate for exercise, they may be enough to get you started.

    If you’re experiencing pain, have existing foot or lower-leg problems, or aren’t sure whether your footwear is appropriate, that’s different. Don’t ignore pain just to stick to a training plan.

    You Don’t Need Headphones

    This one is completely personal preference.

    A lot of people love running with music, podcasts or audiobooks.

    I don’t.

    I run without them.

    So headphones certainly aren’t something I’d put on a must-have list for a first 5K.

    If you enjoy listening to something while you run, great.

    If you don’t, that’s fine too.

    Running doesn’t require entertainment.

    You Don’t Need an Expensive Running Watch Either

    I already owned an Apple Watch, so that’s what I used.

    It was convenient because I could see how far I’d gone.

    But the important information I needed was pretty simple:

    How far did I run?

    You don’t need advanced running analytics just to begin working toward a 5K.

    If you already own a device that can track distance, use it.

    If you don’t, there are other simple ways to measure a route.

    Don’t let the absence of an expensive watch become the reason you don’t start.

    Don’t Turn Your First 5K Into a Shopping Project

    This is probably my biggest equipment recommendation.

    Start running before you start buying.

    You may discover that you love running.

    If you do, great.

    As your distances increase, you can decide which upgrades would actually help you.

    That’s what happened to me.

    I didn’t buy a pile of running equipment and then hope I’d become a runner.

    I started running.

    Then, as my goals grew, I upgraded something that mattered to me—my shoes.

    There’s a big difference.

    The First 5K Doesn’t Have to Be the End

    After I reached three miles, I maintained it for a while and completed the 5K.

    Then something interesting happened.

    I wanted another goal.

    So I started preparing for a 10K.

    And after that, I decided to work toward a half marathon.

    I certainly wasn’t thinking about all of that when I went out for that first one-mile run.

    That’s another reason I wouldn’t overcomplicate the beginning.

    You don’t know where this might lead.

    Your job right now isn’t to become a half-marathon runner.

    Your job is to take the next manageable step toward your first 5K.

    A Simple Way to Start

    You don’t need my exact mileage progression.

    But the philosophy that worked for me was simple:

    • Start with a manageable distance.
    • Run consistently.
    • Increase slowly.
    • Don’t be afraid to maintain a distance for a while.
    • Pay attention to how your body feels.
    • Buy equipment when you have a reason to buy it—not because you think runners are supposed to own it.

    Your first run doesn’t need to be impressive.

    It needs to be something you can recover from and do again.

    What Do You Actually Need?

    Probably less than you think.

    • Some comfortable clothes.
    • Appropriate shoes you can safely exercise in.
    • A reasonable way to know approximately how far you’re going.
    • And a little patience.

    That’s enough to begin.

    You can figure out everything else later.

    Start easy. Progress slowly.

    The first goal isn’t 3.1 miles.

    The first goal is getting out the door.
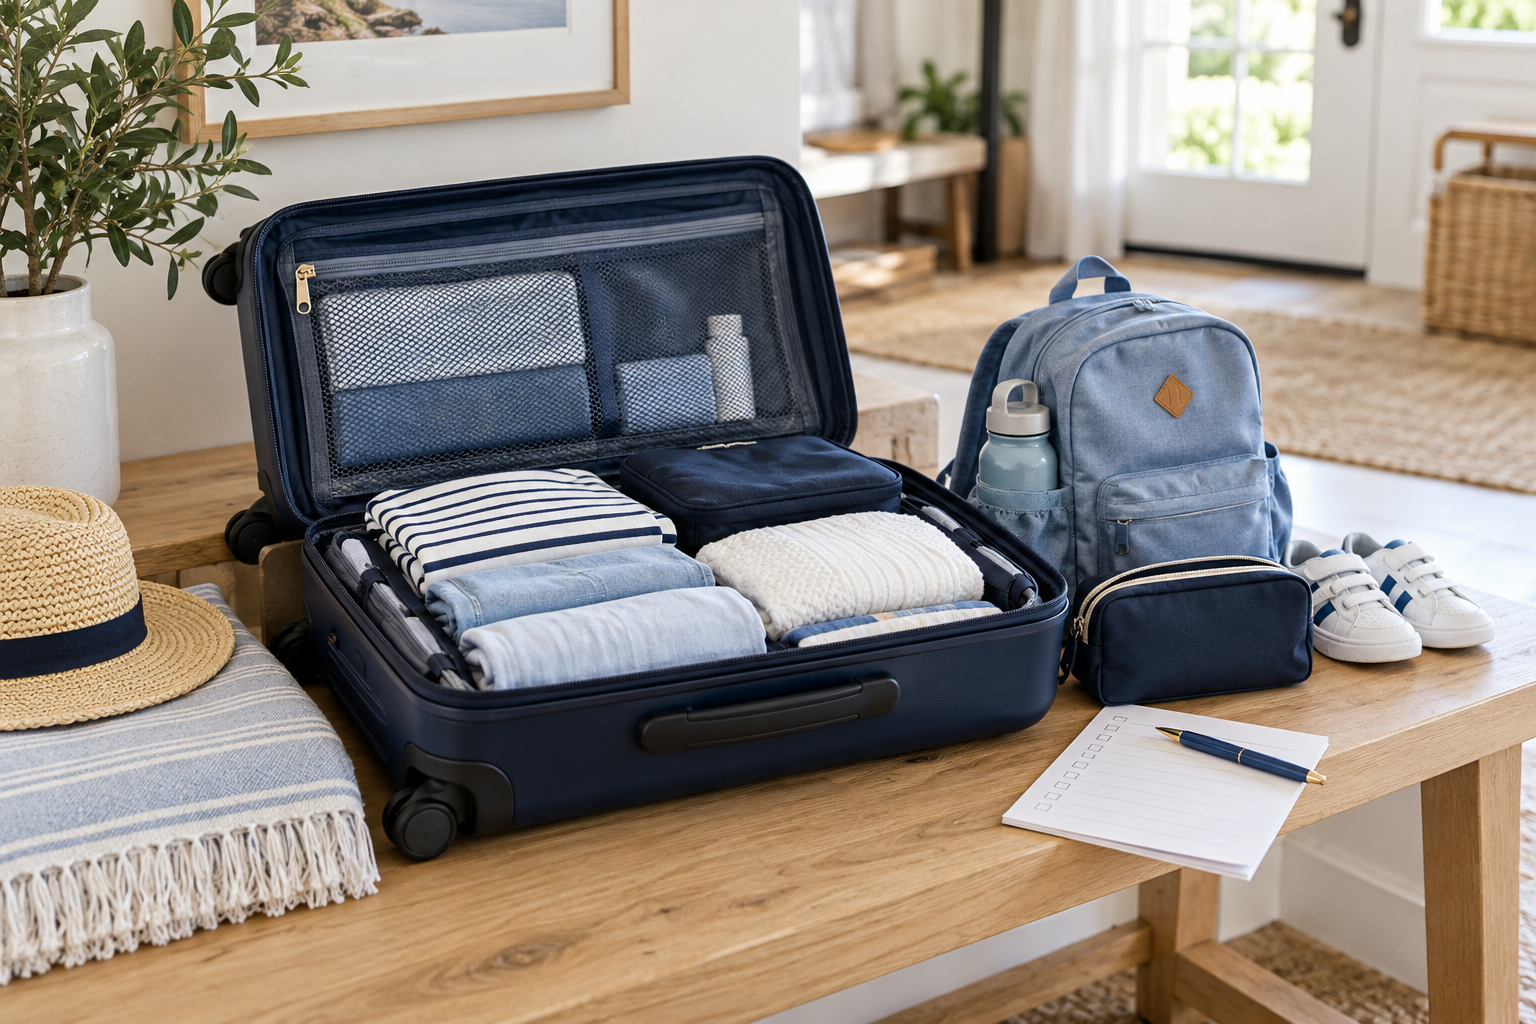
  • The Weekend Trip Packing System: How to Pack Faster and Forget Less

    The Weekend Trip Packing System: How to Pack Faster and Forget Less

    Getting ready for a weekend trip shouldn’t feel harder than the trip itself.

    But it’s easy for that to happen.

    You’re trying to finish laundry. Someone can’t find what they want to bring. You’re looking for toiletries. You realize you’re out of something. The car needs gas. Bags are half packed. There’s stuff all over the house.

    Then departure morning arrives and you’re still getting ready.

    That’s the part I try to avoid.

    Over time, I’ve developed a pretty simple system for getting my family ready for a weekend trip.

    It isn’t complicated.

    Most of it comes down to one idea:

    Do as much as possible before departure day.

    Because departure morning shouldn’t be preparation time.

    It should be departure time.

    Start a Couple Days Before You Leave

    I don’t wait until the night before a trip to start thinking about packing.

    A couple days ahead, I start making a list.

    That list gives me a place to put everything I’m thinking about instead of trying to remember it all later.

    It also gives me time to discover what we don’t have.

    Maybe somebody needs something from the store.

    Maybe something needs to be washed.

    Maybe there’s something we haven’t used in a while that I need to find.

    I’d rather discover that two days before we leave than two hours before we leave.

    Get the Laundry Done Early

    This is a big one for me.

    Before I really start packing, I want the laundry done and the clothes we’re taking available.

    Otherwise, you end up planning around things that are still sitting in the hamper or washing machine.

    Get the laundry out of the way.

    Now everybody’s clothes are available, and you can actually pack.

    It’s one less moving part.

    Go to the Store Before Packing Day

    If we’re missing something for the trip, I want to know about it early.

    That’s another reason I make the list a couple days ahead.

    It gives me time to go to the store and get whatever we need.

    Then when it’s time to finish packing, everything is already there.

    I’m not trying to finish a suitcase while also making a last-minute run to the store.

    Keep Some Things Permanently Packed

    One thing that makes our trips easier is that I keep most of our regular travel toiletries packed and ready.

    I don’t want to rebuild the toiletry bag from scratch every time we go somewhere.

    If there are things you use on almost every trip and you can keep a separate travel version packed, do it.

    When you get home, refill or replace what needs it and put the bag away.

    Next trip?

    One less thing to think about.

    Pack Each Person Separately

    When I’m packing the family, I pack everyone separately.

    That keeps things organized.

    I’m not trying to remember whether one giant pile of clothing contains everything everybody needs.

    Each person’s things have a place.

    I usually start doing this a couple days before we leave and finish the night before the trip.

    Again, the goal isn’t to get everything done in one marathon packing session.

    It’s to spread the work out so the last few hours aren’t chaotic.

    Finish the Night Before

    By the night before we leave, I want the real preparation basically finished.

    Bags packed.

    Anything we need for the trip ready.

    Anything that can’t be packed until morning identified and organized.

    At that point, I don’t want to be wondering:

    What haven’t I thought of yet?

    I want to know what’s left.

    There’s a big difference between having three known things to put in the car tomorrow morning and having an entire trip left to prepare for.

    Clean Out the Car Before the Trip

    This is another job I don’t save for departure morning.

    I clean out the vehicle ahead of time.

    You’re about to put luggage and everything else you’re bringing into it.

    Starting with an already cluttered vehicle makes that harder than it needs to be.

    Get the old water bottles, wrappers, sports gear and whatever else has accumulated in there out of the way.

    Now you have a clean space to load.

    Get Gas Before Departure Day

    Same principle.

    If I know we’re leaving for a trip, I’ll fill the vehicle ahead of time.

    I don’t want the first stop of our vacation to be the gas station five minutes from our house.

    Could I get gas that morning?

    Of course.

    But why leave another job for the morning when I can eliminate it beforehand?

    Every little job you finish early is one less thing standing between your family and the road.

    Clean the House Before You Leave

    This one might sound strange in an article about packing, but it’s an important part of my system.

    I like to clean the house before we leave.

    You’re already going to come home with work to do.

    The vehicle needs to be unloaded.

    Suitcases need to be unpacked.

    You’re going to have laundry from the trip.

    The last thing I want is to walk through the door and also discover the mess we left behind.

    Coming home to a clean house feels different.

    You can unload.

    Unpack.

    Start the laundry.

    Put everything away.

    And you’re basically done.

    You’re not returning from a trip to another giant to-do list.

    To me, preparing for a trip includes preparing for coming home from the trip.

    Set Yourself Up for an Easy Departure

    That’s actually the goal.

    I don’t want departure morning to be exciting.

    I don’t want everybody running around the house.

    I don’t want to be searching for something.

    I don’t want to discover that we need to go to the store.

    I don’t want to be cleaning out the car.

    I don’t want to need gas.

    I want departure morning to be boring.

    Load the car.

    Get everybody in.

    Leave.

    That’s a successful departure morning.

    Some Things Have to Wait Until Morning

    Obviously, you can’t pack absolutely everything the night before.

    There may be refrigerated food, medications, chargers or other things you’re still using.

    That’s fine.

    The goal isn’t to somehow make morning disappear.

    The goal is to make the morning list short and known.

    If five things have to go into the vehicle in the morning, know what those five things are.

    Set yourself up so you aren’t relying on memory while everyone is trying to get out the door.

    Don’t Try to Remember Everything

    This is exactly why I use a list.

    There’s too much going on before a family trip to expect yourself to remember every little thing.

    And forgetting something isn’t always a disaster.

    Most things can be replaced.

    But I’d still rather not spend vacation time and money buying something we already own because it’s sitting on the kitchen counter at home.

    Write it down.

    Check it off.

    Move on.

    Simple systems beat trying to keep everything in your head.

    Coming Home Is Part of the System

    The system isn’t finished when we pull out of the driveway.

    When we get home, I want to reset things.

    Unpack.

    Start the trip laundry.

    Put the travel gear away.

    Refill the toiletries that stay packed.

    That last part matters.

    If I used the last of something on this trip and put an empty container back into the toiletry bag, I’ve just created a problem for Future Me.

    Reset it now.

    Then the next time we’re going somewhere, part of the work is already done.

    You Don’t Need a Perfect Packing System

    You can make packing incredibly complicated.

    There are packing cubes, elaborate lists, travel organizers and all kinds of systems available.

    Some of those things may be useful.

    But the biggest improvement for me isn’t a particular product.

    It’s starting earlier.

    A little work two days before.

    A little more the night before.

    Almost nothing left for departure morning.

    That’s the system.

    Use the Weekend Trip Command List

    I’ve turned this process into a simple Weekend Trip Command List that you can use before your own trips.

    It breaks the preparation into five parts:

    2–3 Days Before

    Night Before

    Load the Car

    Before You Leave

    Coming Home

    Instead of trying to remember the entire trip at once, you can work through the right jobs at the right time.

    [Download the Free Weekend Trip Command List]

    The Goal Isn’t Better Packing. It’s an Easier Departure.

    You can have the most beautifully packed suitcase in the world and still have a miserable departure morning.

    That’s not what I’m trying to optimize.

    I’m trying to make leaving easier.

    Do the laundry ahead of time.

    Get what you need from the store.

    Pack over a couple of days.

    Keep reusable travel items ready.

    Clean the vehicle.

    Fill the gas tank.

    Reset the house.

    Know exactly what’s left for morning.

    Then when departure day arrives:

    Load the car and go.

    Because the best thing you can do for departure morning is finish most of the work before it gets there.

    Departure morning shouldn’t be preparation time.

    It should be departure time.

  • I Have Ants in My House. What Should I Do? A Former Pest-Control Owner’s Guide

    I Have Ants in My House. What Should I Do? A Former Pest-Control Owner’s Guide

    You walk into the kitchen and see a few ants on the counter.

    You kill them.

    A couple of hours later, there are more.

    So you clean the counter, spray the ants you can see, and figure the problem is handled.

    The next morning?

    They’re back.

    If you’ve dealt with ants before, you know how frustrating this can get.

    I owned a pest-control company for about 20 years, and ant problems were something we dealt with constantly. One of the biggest mistakes I saw homeowners make was focusing only on the ants they could see inside the house.

    Those ants may only be a small part of what’s actually going on.

    The good news is that you don’t need to drown your house in pesticide to control ants.

    You need to understand the problem first.

    Figure Out How Big the Problem Is

    Before reaching for a spray or bait, spend a few minutes looking at what the ants are actually doing.

    Ask yourself:

    • Are you seeing one or two ants occasionally?
    • Are there dozens of ants?
    • Is there an established trail?
    • Are they showing up in one room or several?
    • Are they appearing around the same area every day?
    • Can you see where they’re entering?

    A couple of wandering ants is different from an established trail running across your kitchen counter.

    And ants appearing throughout several parts of the house may indicate a larger problem than a few scouts.

    Don’t immediately start spraying everything.

    First, investigate.

    Ant species matter, too. If you cannot identify the ants, your local cooperative extension service or a pest-control professional can help you choose an appropriate approach.

    Don’t Just Kill the Ants You See

    This is probably the most important concept in this entire guide.

    The ants walking across your counter aren’t necessarily the whole problem.

    There may be many more ants:

    • inside a wall
    • underneath the house
    • around the foundation
    • beneath a patio or deck
    • in landscaping
    • somewhere else outside the house

    If you spray the ten ants walking across the counter, congratulations—you killed ten ants.

    But you may not have done much to the colony producing them.

    That’s why successful ant control usually requires thinking beyond the ants you can see.

    Think Inside AND Outside

    When I handled recurring ant problems professionally, I didn’t look only at the kitchen counter.

    I wanted to know what was happening around the entire structure.

    Walk around the outside of your house and look carefully.

    Pay attention to areas around the foundation, doors, windows, patios, decks and other places where ants may be active.

    Look at tree branches, bushes or other vegetation touching the structure.

    And most importantly:

    Watch the ants.

    If you find an established trail outside, follow it.

    Ants are giving you information.

    You may discover a trail running along the foundation, across a patio, up an exterior wall or toward the house.

    Finding that activity can help you understand why ants keep appearing inside.

    One of the things I saw repeatedly during my pest-control years was homeowners using indoor bait over and over while never looking outside.

    The bait might kill ants.

    But if significant exterior activity or pressure isn’t being addressed, you can find yourself putting out more bait every time ants return.

    At that point, you’ve basically opened an all-you-can-eat ant buffet.

    There Are a LOT of Ants Out There

    Sometimes homeowners feel like they must be doing something wrong because ants keep appearing.

    Not necessarily.

    Ants are everywhere.

    A major scientific estimate published in 2022 put the number of ants on Earth at roughly 20 quadrillion.

    That’s approximately 2.5 million ants for every person on the planet at the time of the estimate.

    So if a few decided to stop by your kitchen, you’re not exactly beating impossible odds. 😂

    The point isn’t that you should accept ants living in your house.

    It’s that having ants does not automatically mean your house is dirty.

    Sometimes you simply get ants.

    The goal is to understand why they’re there and deal with the problem intelligently.

    If the Ants Are Eating the Bait, Leave Them Alone

    This is where a lot of homeowners accidentally interfere with the treatment.

    You put out ant bait.

    The ants find it.

    Suddenly there seem to be more ants around the bait than there were before.

    Your first reaction might be:

    This stuff is making the problem worse.

    Not necessarily.

    If ants are actively feeding on the bait, that’s usually exactly what you want them to do.

    Baits are designed so ants can feed on them and carry the material away from the bait placement.

    So if ants are feeding:

    Don’t kill them.

    Don’t wipe them up.

    Don’t panic because you’re seeing more activity around the bait.

    Give them an opportunity to do what the bait is designed to let them do.

    This applies to ants feeding at a properly placed bait. Keep cleaning food spills and crumbs elsewhere; never leave ants on food or food-contact surfaces just to preserve a trail.

    Don’t Spray Around Your Bait

    Another common mistake is combining bait with a spray in the same area.

    A homeowner sees ants feeding on bait and thinks:

    I’ll really get them now.

    Then they spray the ants and the area surrounding the bait.

    That can work against what you’re trying to accomplish.

    If you’re using bait, you generally want ants to approach it and feed.

    Spraying pesticides or strong cleaners around the bait area may interfere with that.

    If the ants are feeding on the bait, resist the urge to attack the ants you can see.

    Sometimes doing less is the better strategy.

    You Don’t Need a Mountain of Gel

    More bait isn’t automatically better.

    One mistake I saw was homeowners assuming that if a little bait was good, squeezing out a huge pile must be even better.

    That’s not how I approached baiting professionally.

    Use the product according to its current label and follow its directions for placement and amount.

    Keep all pesticides and bait placements out of reach of children and pets, and away from food. Use only locations permitted by the current product label, including its restrictions for food-preparation areas.

    The objective is to provide appropriate bait placements where ants can find and feed on them—not decorate the kitchen with ant gel.

    And always place pesticides where the label allows, especially around children, pets and food-preparation areas.

    Give the Bait Time

    Ant bait isn’t necessarily an instant treatment.

    That’s part of the point.

    If you’re expecting every ant to disappear within an hour, you may decide the treatment failed long before you’ve given it a reasonable opportunity to work.

    When I dealt with ant problems, I didn’t judge bait based on what happened in the first few hours.

    Give the treatment some time.

    As a practical rule, I would usually reassess the situation after about a week to see whether we were making progress. That didn’t necessarily mean the bait had failed if ants were still present—some bait treatments can take considerably longer. Always follow the current product label.

    But don’t put bait out Monday morning and declare it useless Monday afternoon.

    What If the Ants Ignore the Bait?

    Now we have a different situation.

    You put the bait down.

    The ants walk right past it like it’s broccoli.

    First, don’t immediately assume that all ant bait is useless.

    Check the bait itself.

    How old is it?

    How has it been stored?

    Has it been sitting in a hot garage for years?

    Is it dried out or otherwise in poor condition?

    Sometimes that tube has been rolling around in the garage so long it should be paying rent. 😂

    Also remember that different ants and different situations may respond differently to different bait formulations.

    If ants aren’t interested in one appropriate bait, another bait or formulation may be worth considering.

    That does not mean putting five different pesticides everywhere and hoping something works.

    It means slowing down and diagnosing the problem.

    Don’t Obsess Over One Entry Point

    Finding where ants are entering is useful.

    But don’t assume that sealing one tiny crack automatically solves the entire problem.

    Ants can use extremely small openings, and a structure can have many potential entry points.

    Rather than spending hours trying to identify one magical crack, look at the bigger picture:

    Where are the ants active?

    Where are the established trails?

    What’s happening around the exterior?

    Are there branches or bushes contacting the house?

    Are there food or water sources attracting activity?

    The goal isn’t simply to block one ant.

    It’s to understand what’s happening around the property.

    A New Ant Trail May Be a Different Colony

    Here’s another situation that can confuse homeowners.

    You treat one area successfully.

    The ants disappear.

    Then later you see ants somewhere else.

    It’s tempting to assume:

    The treatment just moved them.

    Not necessarily.

    A new trail in another location may represent completely different ant activity.

    Remember—there are a lot of ants out there.

    That’s why I prefer looking at the whole property instead of treating every ant trail as though it must be part of one giant colony.

    Does Having Ants Mean Your House Is Dirty?

    No. Not necessarily.

    Can cleanliness contribute to an ant problem?

    Absolutely.

    If you’ve got a greasy stovetop, unswept floors, food debris on the counters or crumbs regularly left around, you’re giving ants additional food sources.

    Cleaning those things up should be part of addressing the problem.

    Also repair leaks, store food in sealed containers, trim vegetation away from the house and seal accessible entry gaps as part of prevention.

    But here’s the other side of it:

    I’ve seen ants in spotless houses.

    You can keep an extremely clean home and still get ants.

    So don’t assume that seeing an ant trail across your kitchen means you’re doing something wrong.

    Cleanliness matters, and removing available food sources can help. But a clean house isn’t some invisible force field that ants can’t cross.

    Sometimes a clean house gets ants too.

    When It’s Time to Call a Professional

    I’m a big believer in letting homeowners handle a reasonable ant problem themselves if they’re comfortable doing it.

    But there comes a point when DIY stops making sense.

    For me, there are two big signs.

    1. You Have a LOT of Ants

    I’m not talking about five ants wandering around the kitchen.

    I’m talking about heavy activity.

    Multiple trails.

    Hundreds of ants.

    Ants seemingly everywhere.

    If you’re looking around the property and thinking, This is a lot bigger than a few ants coming through the kitchen window, I’d consider calling a pest-control professional.

    In fact, if the infestation is already that heavy when you first discover it, you may want to skip the DIY stage altogether.

    2. You Can’t Get Rid of the Few Ants You Have

    The opposite situation can be just as frustrating.

    Maybe you don’t have hundreds of ants.

    You only have a few.

    But they won’t go away.

    You treat one area.

    They disappear.

    Then they’re back.

    You try something else.

    Now you’re seeing them somewhere else.

    Eventually you start feeling like you’re chasing the ants around the house.

    That’s another point where I’d consider bringing in a professional.

    Not necessarily because the number of ants is overwhelming, but because you’ve tried to solve the problem and aren’t getting control of it.

    There’s no prize for spending the next two months chasing six ants around your kitchen.

    Sometimes it’s simply time to let somebody who deals with these problems every day take a look.

    If You’re Calling a Professional, Don’t Destroy the Evidence

    If you’ve decided to call a pest-control professional, here’s something that can actually help them:

    Leave the ants alone if you can.

    If leaving activity undisturbed would be unsafe or unhygienic, take clear photos of the ants and their trail before cleaning the area.

    I would much rather arrive at a customer’s house and see an active ant trail than hear:

    “There were hundreds of them right here, but I sprayed everything before you came.”

    When the ants are still active, I can study them.

    Where are they coming from?

    Where are they going?

    What path are they following?

    Can I follow that activity toward an entry point or another area of the property?

    Those ants aren’t just the problem.

    They’re also giving the technician clues about the problem.

    If you kill everything you can see right before the professional arrives, you’ve potentially removed some of the information they could have used during the inspection.

    So if you’ve already made the decision to bring someone in and the situation allows it:

    Don’t clean up the evidence before the detective arrives.

    Let the professional see what’s actually happening.

    Pest Control Starts With Investigation

    If there’s one idea I’d like homeowners to take away from this guide, it’s this:

    Don’t start with the pesticide. Start with the investigation.

    During my years in pest control, I needed to be an investigator.

    Where are the ants?

    Where are they going?

    Where are they coming from?

    What’s happening outside?

    Are they feeding on the bait?

    Is there one trail or activity in several areas?

    The answers to those questions can tell you much more than simply killing the ants standing in front of you.

    It’s similar to something I encountered with termites.

    Sometimes a homeowner would call because they believed they’d found termite activity. I’d arrive and discover they’d already cleaned up the termite droppings.

    Now I had less information to work with.

    Those droppings were evidence.

    I wanted to see where they were and what was happening around that area.

    The same basic principle applies to ants:

    Observe first. Treat second.

    You Don’t Have to Win the War in One Day

    Seeing ants in your kitchen is annoying.

    I understand the instinct to grab something and start spraying.

    But slow down for a minute.

    Watch them.

    Look inside and outside.

    Follow the trails you can find.

    Remove unnecessary food sources.

    If you’re using a bait and the ants are feeding on it, let them feed and give the treatment an opportunity to work.

    If you’re dealing with heavy activity—or you’ve reached the point where you feel like you’re constantly chasing a few stubborn ants around the house—it may be time to bring in a professional.

    You don’t need to panic.

    You don’t need to cover the house in pesticide.

    And you don’t need to kill every ant you see within the next five minutes.

    Investigate the problem. Understand what you’re seeing. Then decide how to treat it.

    That’s how I approached ant problems professionally.

    And it’s where I’d recommend a homeowner start too.

    Make a simple plan for the next step. Note where you see activity, what you have tried and when you plan to reassess. Our free Daily Command List gives you a place to keep those reminders alongside the rest of your day.

    Further reading: UC IPM: Ants and EPA: Do’s and Don’ts of Pest Control. Professional experience informs this guide; current product labels govern pesticide use.

  • The Ultimate Youth Sports Tournament Weekend Checklist

    The Ultimate Youth Sports Tournament Weekend Checklist

    Youth sports tournament weekends can be a lot of fun.

    They can also feel like you're moving your entire household to another city for 48 hours.

    Uniforms. Equipment. Food. Coolers. Chairs. Hotel reservations. Game schedules. Chargers. Water bottles. Extra clothes. Sunscreen. Maybe rain gear.

    And somehow, after packing all of that, it's still possible to get halfway down the road and realize:

    We forgot the shoes.

    I've been there.

    Over the years, our family spent plenty of time traveling for our kids' sports. We generally made our children responsible for packing their own player gear.

    I still think that's the right approach.

    Kids should learn to take responsibility for their uniforms, equipment, and everything else they need to play.

    There's just one little adjustment I'd recommend:

    Player Packs. Parent Verifies.

    I learned that lesson after my son forgot his basketball shoes once—and his football cleats another time.

    Nothing improves your packing system quite like arriving somewhere without the one thing your child absolutely needs to play.

    So here's the system I'd use to make tournament weekends a little easier.

    Quick Tournament Weekend Packing Checklist

    Short on time? Start with these essentials:

    • Player gear: Uniform, shoes or cleats, socks, equipment, warmup clothes, extra clothes, and water bottle.
    • Parent gear: Folding chair or bleacher seat, sunscreen, hat, sunglasses, weather protection, and phone charger.
    • Food and drinks: Cooler, water, snacks, easy meals, fruit, and ice packs.
    • Travel and hotel: Tournament address, game schedule, parking information, hotel confirmation, toiletries, and medications.
    • Night before: Check the weather and schedule, charge devices, prepare food, pack bags, and load what you can.

    Before leaving, do the Final Four Check: People. Gear. Food/Cooler. Phone/Wallet/Keys.

    For the full system, keep reading—or grab our free printable Tournament Weekend Checklist at the end.

    1. Start With the Player's Gear

    The player should know what he or she needs better than anyone.

    Depending on the sport, that might include:

    • Uniform or jersey
    • Shorts or pants
    • Socks
    • Game shoes or cleats
    • Sport-specific equipment
    • Warmup clothes
    • Extra clothes
    • Water bottle

    If your child is old enough, let them pack it.

    You're not trying to raise a kid who needs Mom or Dad to pack their sports bag forever.

    But there's a difference between giving your child responsibility and blindly assuming everything made it into the bag.

    That's where the second half of our rule comes in:

    Player Packs. Parent Verifies.

    You don't necessarily need to unpack the entire bag and start over.

    Ask the important questions.

    Uniform?

    Equipment?

    Shoes?

    And because I've learned this one the hard way:

    Are you SURE you have your shoes?

    2. Pack for the Parents Too

    The kids aren't the only ones spending all day at the tournament.

    Depending on the venue, parents may be sitting in a gym, standing beside a field, sitting on metal bleachers, or moving from game to game for hours.

    Think about your own comfort too.

    Useful items can include:

    • Folding chair or bleacher/stadium seat
    • Sunscreen
    • Hat
    • Sunglasses
    • Extra layers
    • Rain gear or umbrella
    • Blanket for cold-weather events
    • Portable phone charger
    • Cash and/or credit card

    One Item I Think Can Be Worth It: A Bleacher Seat

    If you've ever spent an entire Saturday sitting on metal bleachers, you already know why this made the list.

    A padded bleacher or stadium chair with back support can make a long day much more comfortable.

    There are even heated versions for cold-weather events.

    You certainly don't need one to attend a tournament. But if your family spends a lot of weekends at sporting events, this is one of those products that may actually get used rather than ending up in the garage.

    3. Don't Leave Food Until the Last Minute

    Tournament food can get expensive quickly, especially when you're feeding an entire family.

    And depending on the facility, the food choices may not be particularly great.

    A little preparation can help.

    Consider packing:

    • Cooler
    • Water
    • Sports drinks, if your family uses them
    • Easy snacks
    • Sandwiches or meals
    • Fruit
    • Ice or ice packs

    You don't need to prepare a gourmet picnic.

    You need food that's easy to grab, easy to eat, and easy to carry.

    And make sure the cooler actually gets into the vehicle.

    We'll come back to that.

    4. Check the Schedule Before You Leave

    Tournament schedules can be confusing.

    Different fields. Different gyms. Different complexes. Different start times.

    Don't rely entirely on what you remember someone saying three days ago.

    Before leaving, verify:

    • Where are we playing?
    • What time is the first game?
    • What time do we actually need to arrive?
    • Where do we park?

    If you're traveling overnight, also have your:

    • Hotel confirmation
    • Tournament address
    • Game schedule
    • Parking information
    • Medications
    • Toiletries
    • Device chargers
    • Swimsuits, if appropriate

    And yes, somehow a child can spend the entire day playing sports and still ask:

    "Can we go swimming at the hotel?"

    Where do they get this energy?

    5. Do as Much as Possible the Night Before

    Tournament morning is not the ideal time to discover that something needs washing, charging, freezing, or finding.

    The night before, take a few minutes to:

    • Check the weather
    • Confirm the first game time and location
    • Charge phones and devices
    • Freeze ice packs
    • Prepare food and snacks
    • Lay out the uniform
    • Pack the player's bag
    • Load anything that can safely stay in the vehicle

    This is one of those situations where 15 minutes tonight can save 30 minutes of chaos tomorrow morning.

    The goal is to wake up knowing most of the work is already done.

    The Final Four Check

    Okay.

    Everybody is dressed.

    The bags are packed.

    The vehicle is loaded.

    You're about to pull out of the driveway.

    Stop for 30 seconds.

    Do the Final Four Check.

    1. PEOPLE

    Is everybody who's supposed to be going actually in the vehicle?

    It sounds ridiculous.

    Then you remember Home Alone.

    Check the people.

    2. GEAR

    Uniform?

    Equipment?

    Player's bag?

    And one more time for my family:

    SHOES OR CLEATS?

    Yes.

    We’re asking again.

    3. FOOD / COOLER

    Did the cooler actually make it into the vehicle?

    Not packed.

    Not sitting by the door.

    Not waiting on the kitchen counter.

    In. The. Vehicle.

    4. PHONE / WALLET / KEYS

    The basics.

    If you've got the people, the gear, the food, and the essentials, you're probably ready to go.

    What If You Still Forget Something?

    You probably will eventually.

    That's family life.

    The goal of a checklist isn't to create a military operation every time your child has a basketball tournament.

    It's to reduce the number of things you have to remember.

    Instead of walking around the house thinking:

    What am I forgetting?

    You can look at the list.

    Check the boxes.

    Do the Final Four.

    And leave.

    Give Your Kids Some Responsibility

    There's another reason I like having a written checklist.

    The parent doesn’t have to do everything.

    Give the player the list.

    Have them pack their section.

    As kids get older, they can take on more responsibility.

    That's a good thing.

    You're creating a system where the child learns:

    This is my sport. This is my equipment. I need to make sure I’m prepared.

    The parent's job gradually shifts from doing the packing to simply verifying the essentials.

    Player Packs. Parent Verifies.

    That's a system you can eventually work yourself out of.

    Make Tournament Morning Easier

    Tournament weekends are already busy enough.

    You don't need to make them harder by trying to remember 30 things while everyone is walking out the door.

    Pack what you can the night before.

    Give your child responsibility for their gear.

    Verify the essentials.

    Prepare some food.

    Check the schedule.

    Then do the Final Four:

    People.

    Gear.

    Food/Cooler.

    Phone/Wallet/Keys.

    And go enjoy watching your kid play.

    Just check the shoes first.

    Trust me on that one.

    Want to Organize the Entire Tournament Weekend?

    The free checklist helps you remember what to bring.

    But sometimes the packing list is only one part of the weekend.

    There are game schedules, departure times, hotel details, expenses, meals, and all those little things that are easy to overlook.

    That's why we created the Weekend Command Center — Youth Sports & Activities.

    It's a reusable digital planning system designed to help families organize their tournament weekends in one place.

    It includes planning tools for:

    • Weekend schedules and activities
    • Packing and preparation
    • Expenses and budgeting
    • Important weekend details
    • Calendar events through our Smart Calendar Builder

    The Smart Calendar Builder helps turn your weekend plans into a calendar file you can import into your calendar.

    Weekend Command Center — $19.99

    View the Weekend Command Center

    You don't need a complicated system. You just need a reliable place to keep track of the weekend.

    FREE: Command & Simplify Tournament Weekend Checklist

    We've also turned this system into a simple, one-page printable Tournament Weekend Checklist.

    It includes:

    • Player Gear
    • Parent/Sideline
    • Food & Drinks
    • Travel/Hotel
    • Night Before
    • Other/Don't Forget
    • The Final Four Check

    Print one, keep it somewhere handy, and use it before the next tournament weekend.

    Get the Free Tournament Weekend Checklist at Command & Simplify

    The free checklist is available through the Free Tools section of our website.

    Player packs. Parent verifies. Final Four check. Then go enjoy the weekend.